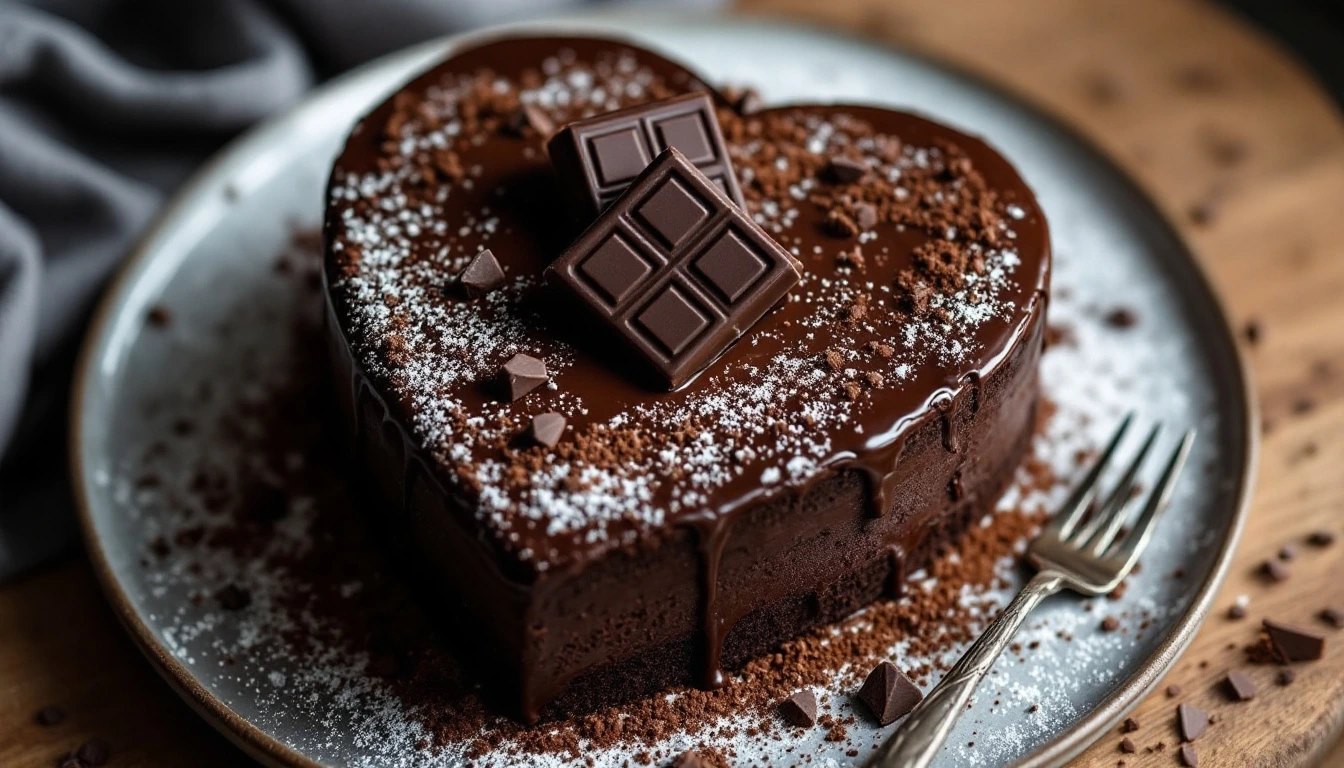
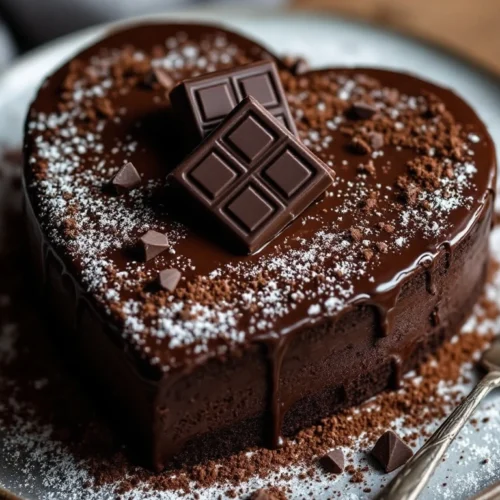
Truly, there’s nothing sweeter than a Chocolate Heart Cake to show love and appreciation for someone special. Whether it’s Valentine’s Day, an anniversary, a birthday, or just a heartfelt surprise, this cake is the perfect way to express love through baking. With its rich, moist chocolate flavor and elegant heart-shaped design, it’s a dessert that’s as beautiful as it is delicious. This homemade Chocolate Heart Cake recipe is easy to make and requires simple ingredients like cocoa powder, butter, sugar, and eggs. The result? It is a decadent cake that melts in your mouth, especially when topped with silky chocolate ganache, whipped cream, or fresh berries. Even if you don’t have a heart-shaped pan, I’ll share an easy trick to create the perfect shape using a round and square cake pan! to impress your loved ones with the most romantic chocolate cake ever. Let’s dive into the recipe and decoration ideas to make this dessert unforgettable!
Why Chocolate Heart Cake is the Perfect Romantic Dessert
A Symbol of Love in Dessert Form
Desserts have always been part of celebrations, but a Chocolate Heart Cake goes beyond satisfying a sweet tooth—it symbolizes love, affection, and meaningful connection. The heart shape is universally recognized as a representation of love and devotion, making this cake a perfect choice for romantic occasions, heartfelt celebrations, and even as a thoughtful gesture of appreciation. Learn more about the romantic history of chocolate
1. The Emotional Connection to Heart-Shaped Cakes
A Chocolate Heart Cake is more than just a delicious treat; it’s a gesture of love and effort. Unlike store-bought chocolates or generic gifts, a homemade cake requires time, dedication, and a personal touch. Whether you’re baking for a partner, spouse, family member, or close friend, presenting a heart-shaped cake tells them, “I made this with love, just for you.”
It does create moments and memories. Imagine your loved one’s joy as they see a beautifully decorated chocolate heart cake waiting for them. Whether it’s a romantic surprise, a birthday delight, or a sweet ending to a special dinner, this dessert adds a touch of warmth and intimacy to any occasion.
2. Chocolate: The Flavor of Romance and Comfort.
Chocolate has long been associated with love, romance, and indulgence. Scientifically, chocolate contains compounds like phenylethylamine (PEA), which stimulates the production of feel-good hormones, mimicking the emotions of falling in love. No wonder chocolate is the go-to choice for romantic treats!
Chocolate’s rich, deep flavors evoke comfort, passion, and a sense of luxury, making it a perfect match for a heart-shaped cake. Whether paired with silky ganache, creamy buttercream, or a dusting of cocoa powder, chocolate enhances the experience of indulgence and satisfaction.
3. Why a Chocolate Heart Cake Stands Out
A Chocolate Heart Cake isn’t just another dessert—it’s a centerpiece that speaks volumes. Here’s why it stands out among other sweet treats:
- A Thoughtful Surprise: It’s a handmade expression of love, showing more effort than a store-bought cake or box of chocolates.
- Perfect for Special Occasions: Whether it’s Valentine’s Day, an anniversary, a birthday, or even a wedding, a heart-shaped cake creates a romantic and sentimental atmosphere.
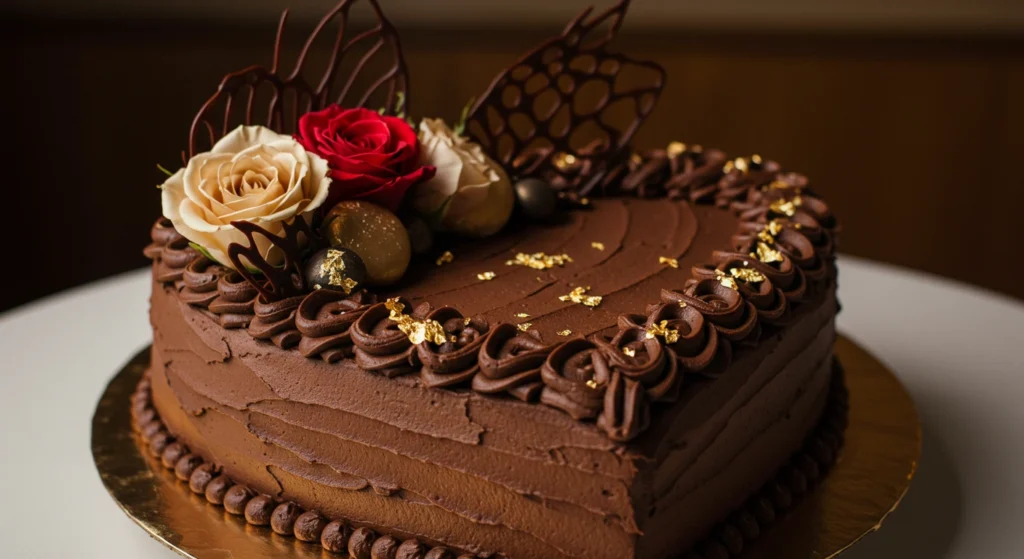
- Customizable for Personal Touches: To make it uniquely special, you can personalize it with frosting messages, fresh berries, sprinkles, edible flowers, or even gold leaf accents.
- A Treat to Share: The heart shape naturally encourages sharing, making it an intimate dessert for two or a delightful centerpiece for a group celebration.
- A Dessert That Makes Every Occasion Extra Special
From romantic date nights to family gatherings, a Chocolate Heart Cake adds a sense of occasion and warmth to any event. It can symbolize love between partners, be a sweet expression of gratitude for a parent or friend, or even be a delightful surprise for a child’s birthday.
So whether you’re baking to impress a special someone or simply indulging in a heartfelt treat for yourself, a Chocolate Heart Cake is the perfect way to share love—one bite at a time!
Ideal for Special Occasions
A Chocolate Heart Cake is more than just a dessert—it’s a statement of love, joy, and celebration. Its heart shape and rich chocolate flavor make it a perfect centerpiece for various special occasions, adding warmth and sweetness to any gathering. Whether you’re celebrating love, friendship, or a personal milestone, this cake fits effortlessly into the moment, making it extra memorable.
1. Valentine’s Day: The Ultimate Romantic Gesture
Valentine’s Day is the holiday of love, and what better way to express your feelings than with a homemade Chocolate Heart Cake? While flowers and chocolates are classic gifts, baking a cake from scratch shows an extra level of care and thoughtfulness.
- Why It’s Perfect: The heart shape symbolizes love, and chocolate’s deep, rich flavors are naturally associated with romance.
- How to Make It Extra Special: For an elegant touch, decorate with fresh strawberries, a drizzle of glossy chocolate ganache, or a dusting of powdered sugar. You can also pipe a heartfelt message on top, such as “I Love You” or “Be Mine.”
Instead of store-bought sweets, a homemade heart-shaped cake makes the occasion feel more personal and intimate, perfect for a romantic evening at home.
2. Anniversaries: Celebrate Love and Milestones
Whether you’re celebrating your first anniversary or a golden milestone, a Chocolate Heart Cake is an excellent way to mark the occasion.
- Why It’s Perfect: Anniversaries are about cherishing special memories, and a heart-shaped cake symbolizes your love journey.
- How to Make It Extra Special: For a customized, sentimental touch, add decorative elements like edible gold flakes, a dusting of cocoa powder, or even a small edible photo printed on the cake.
Consider making this cake together as a couple—baking can be a fun, romantic bonding experience that makes the moment even sweeter.
3. Birthdays: A Unique and Heartfelt Surprise
Birthdays are about making someone feel special, and a Chocolate Heart Cake does that. Whether for a romantic partner, a best friend, a parent, or a child, a heart-shaped cake shows that you’ve gone the extra mile to make their day meaningful.
- Why It’s Perfect: Birthdays are personal, and nothing feels more heartfelt than a cake that symbolizes love and appreciation.
- How to Make It Extra Special: Customize the cake with the birthday person’s favorite flavors, such as adding a layer of raspberry jam, caramel drizzle, or a peanut butter filling.
- Creative Birthday Twist: Write their name in icing or use fondant cutouts to shape numbers or fun decorations.
This cake is also great for kids’ birthdays, especially if they love chocolate—decorated with colorful sprinkles, candy hearts, or themed cake toppers to match their personality.
4. Weddings and Engagement Parties: A Romantic Cake Choice
A Chocolate Heart Cake is a wonderful addition to weddings, engagement parties, or bridal showers. While traditional wedding cakes tend to be tiered and vanilla-flavored, a heart-shaped chocolate cake is a romantic and modern alternative.
- Why It’s Perfect: Weddings and engagements celebrate love, and a heart-shaped cake perfectly complements the theme.
- How to Make It Extra Special: Consider a multi-layered heart cake with decadent fillings like chocolate mousse, espresso cream, or hazelnut ganache.
- Elegant Wedding Cake Decoration: Decorate with white chocolate drizzle, edible flowers, or gold foil accents for an upscale touch.
Even if the couple has a large wedding cake, a heart-shaped chocolate cake can be a sweet addition to the dessert table or serve as a special cake for just the bride and groom.
5. Just Because: A Sweet Way to Show You Care
Sometimes, the best reason to bake a Chocolate Heart Cake is to spread love and happiness—no special occasion is needed!
- Why It’s Perfect: A heart-shaped chocolate cake can be a comfort food, a surprise treat, or a way to brighten someone’s day.
- How to Make It Extra Special: If you’re baking for a friend or family member, personalize it with their favorite toppings, such as whipped cream, crushed nuts, or caramel drizzle.
A simple “thinking of you” or “thank you” cake can make a huge impact and show appreciation in a way that words sometimes can’t.
A Cake That Fits Every Celebration
No matter the occasion, a Chocolate Heart Cake is a versatile dessert that adds a touch of love, warmth, and joy to any celebration. It’s easy to make, endlessly customizable, and always appreciated by the lucky person who enjoys it.
So whether you’re baking for romance or friendship or to indulge in a decadent chocolate treat, a Chocolate Heart Cake is always the perfect choice!
Rich, Moist, and Absolutely Delicious: The Secret to a Perfect Chocolate Heart Cake
A Chocolate Heart Cake isn’t just about its romantic appearance—the indulgent taste and texture make it unforgettable. The perfect chocolate cake should be rich in flavor, moist in texture, and irresistibly delicious with every bite. Whether baking for a special occasion or simply craving chocolatey goodness, getting the right balance of ingredients and techniques ensures a cake melts in your mouth.
1. The Secret to Rich Chocolate Flavor
The hallmark of a truly decadent Chocolate Heart Cake is its deep, intense chocolate taste. Achieving this requires choosing high-quality ingredients that enhance the cake’s richness.
- Use High-Quality Cocoa Powder: Opt for Dutch-processed cocoa powder for a smoother, more intense chocolate flavor. Natural cocoa powder works too, but Dutch-processed provides a deeper, less acidic taste.
- Enhance with Melted Chocolate: Adding melted dark or semi-sweet chocolate to the batter intensifies the depth of flavor, making the cake taste more luxurious.
- Boost Flavor with Coffee: A little bit of strong brewed coffee or espresso powder enhances the chocolate flavor without making the cake taste like coffee. The bitterness of coffee balances the sweetness and deepens the richness of cocoa.
- A Hint of Vanilla: A teaspoon of vanilla extract enhances the overall chocolate flavor, giving it a warm and comforting aroma.
2. How to Achieve a Moist and Tender Texture
A chocolate cake should never be dry or crumbly! The secret to a moist, soft, and velvety cake lies in the balance of fat, liquid, and mixing technique.
- Oil vs. Butter: While butter adds flavor, vegetable oil or melted butter ensures moisture. Oil prevents the cake from drying out, making it softer and more tender.
- Buttermilk or Yogurt for Tenderness: These ingredients add acidity, which helps break down the gluten, resulting in a cake with a super soft crumb. If you don’t have buttermilk, you can make your own by adding 1 tablespoon of vinegar or lemon juice to a cup of milk.
- Eggs for Structure and Richness: Eggs provide structure and help create a light, fluffy texture. Using room-temperature eggs ensures they mix well with other ingredients.
- Hot Water or Milk for Extra Moisture: Adding hot water, warm milk, or even boiling coffee helps bloom the cocoa powder, intensifying the flavor while keeping the cake moist.
3. The Perfect Balance of Sweetness and Depth
A great chocolate cake isn’t just sweet—it has a balance of deep, chocolatey richness with just the right amount of sweetness.
- Brown Sugar vs. White Sugar: Using a mix of granulated and brown sugar adds complexity. Brown sugar contains molasses, which adds moisture and a slight caramel undertone.
- Salt for Flavor Contrast: A pinch of salt is essential—it enhances the chocolate’s depth and prevents the cake from tasting too sweet.
- Optional Flavors for Extra Depth: Some bakers love adding a hint of cinnamon, cayenne pepper, or even a splash of rum or bourbon for a subtle, unique flavor twist.
4. The Magic of a Perfectly Baked Cake
Even the best cake batter can turn dry if it’s overbaked. Follow these baking tips to keep your Chocolate Heart Cake light, moist, and tender:
- Preheat Your Oven Properly: Always preheat to the correct temperature (350°F / 175°C) before baking. An oven that’s too hot can dry out the cake, while one that’s too cool can cause uneven baking.
- Do Not Overmix: Overmixing can develop too much gluten, creating a dense and tough cake. Mix until the ingredients are just combined.
- Use the Right Pan: A heart-shaped pan is ideal, but you can also bake in round or square pans and cut out the heart shape. Grease and flour the pan well to prevent sticking.
- Check for Doneness Properly: Insert a toothpick into the center of the cake—if it comes out with a few moist crumbs, it’s done. If it comes out completely clean, the cake may be overbaked.
5. Finishing Touches: Frosting and Toppings for Maximum Deliciousness
The right frosting can elevate your Chocolate Heart Cake from delicious to absolutely divine!
- Chocolate Ganache: A silky, glossy ganache (made with heavy cream and melted chocolate) adds an extra layer of indulgence.
- Whipped Buttercream: A light, airy chocolate buttercream frosting balances the rich cake with a creamy texture.
- Cream Cheese Frosting: If you prefer a tangy contrast, cream cheese frosting pairs beautifully with chocolate cake.
- Fresh Berries & Toppings: Add fresh strawberries, raspberries, or cherries for a pop of freshness and a burst of color. Sprinkles, edible gold leaf, or cocoa powder dusting can add elegance.
Why This Chocolate Heart Cake is Absolutely Irresistible
A Chocolate Heart Cake isn’t just another chocolate cake—it’s a decadent experience in every bite. Its rich, deep chocolate flavor, ultra-moist texture, and luxurious toppings make it the ultimate dessert for romantic celebrations, birthdays, anniversaries, or any occasion you want to impress. With the right ingredients and techniques, you can achieve the perfect balance of rich, moist, and absolutely delicious, making this Chocolate Heart Cake a true labor of love.
Ingredients and Tools You Need for a Perfect Chocolate Heart Cake
Essential Ingredients for the Perfect Chocolate Heart Cake
The secret to a rich, moist, and flavorful Chocolate Heart Cake lies in choosing the right ingredients. Each ingredient plays a crucial role in achieving the cake’s perfect texture, taste, and structure. From high-quality cocoa powder to the right balance of fats and leavening agents, understanding the function of each ingredient ensures that your cake turns out soft, decadent, and full of deep chocolate flavor.
Below, we break down the essential ingredients that make this cake a standout dessert for any occasion.
1. Flour – The Foundation of the Cake
Flour provides the structure and stability needed to hold the cake together.
- Best Choice: All-purpose flour is the most commonly used and gives the cake a good balance of structure and softness.
- Alternative: If you want a lighter texture, you can substitute cake flour, which has a lower protein content and makes the cake softer.
- Gluten-Free Option: Use almond flour or a gluten-free flour blend if you need a gluten-free version.
Tip: Always sift the flour to remove lumps and ensure your cake has an even, airy texture.
2. Cocoa Powder – The Heart of Chocolate Flavor
The quality of your cocoa powder significantly impacts the richness and depth of your chocolate cake.
- Dutch-processed cocoa powder is less acidic and provides a smoother, deeper chocolate flavor.
- Natural cocoa powder is more acidic and reacts with baking soda, helping the cake rise. It gives a slightly more bitter and tangy chocolate taste.
- Unsweetened cocoa powder ensures that you have control over the sweetness of your cake.
Tip: Combine cocoa powder and melted dark chocolate in the batter for an extra-rich flavor.
3. Sugar – Balancing Sweetness and Moisture
Sugar does more than sweeten the cake—it helps retain moisture and creates a soft, tender crumb.
- Granulated Sugar: White sugar provides sweetness and structure.
- Brown Sugar: Contains molasses, adding moisture and a hint of caramel flavor, making the cake softer.
- Alternative Sweeteners: Coconut sugar or honey can be used as a more natural sweetener option.
Tip: A combination of white and brown sugar enhances both texture and flavor depth.
4. Fats – Ensuring a Moist and Tender Cake
Fat is key to a moist, rich, and velvety chocolate cake.
- Butter: Adds richness and flavor but can make the cake slightly denser.
- Vegetable Oil: Provides extra moisture and prevents the cake from drying out, even after refrigeration.
- Best Approach: Combine butter for flavor and oil for moisture to achieve the best of both worlds.
- Dairy-Free Alternative: Coconut oil or a neutral-flavored oil like avocado oil can be used instead.
Tip: Melted butter combines best with oil to achieve a moist yet structured cake.
5. Eggs—The Binding Agent Eggs help bind the ingredients together and contribute to the cake’s structure, richness, and tenderness.
- Egg Yolks: Add extra moisture and help emulsify the batter for a smoother texture.
- Egg Whites: Provide stability and help the cake rise.
- Substitutes: For an egg-free version, you can use applesauce, mashed bananas, yogurt, or flax eggs (1 tbsp flaxseed meal + 3 tbsp water per egg).
Tip: Use room temperature eggs for better incorporation into the batter, preventing lumps and uneven texture.
6. Leavening Agents – Helping the Cake Rise
Leavening agents are essential for creating a light and fluffy texture.
- Baking Powder: Helps the cake rise by creating air pockets in the batter.
- Baking Soda: Reacts with acids (like buttermilk or cocoa powder) to create a softer crumb and better rise.
Tip: Always check the expiration date of your baking powder and soda—expired leavening agents won’t work properly, leading to a dense cake.
7. Liquid Ingredients – Adding Moisture and Depth
The right liquids ensure that the cake remains moist, soft, and full of flavor.
- Milk or Buttermilk: Keeps the cake moist and adds richness. Buttermilk also helps tenderize the cake.
- Hot Water or Brewed Coffee: Enhances the chocolate flavor and ensures the cocoa powder dissolves evenly into the batter.
- Alternative Liquids: Almond milk, coconut milk, or yogurt can be used for a dairy-free version.
Tip: Using coffee instead of hot water will not make the cake taste like coffee, but it will enhance the depth of the chocolate flavor.
8. Vanilla Extract – Enhancing the Overall Flavor
A small amount of pure vanilla extract balances the chocolate flavor and gives the cake an added depth of taste.
Tip: Use pure vanilla extract instead of artificial vanilla for the best flavor.
9. Salt – The Secret Ingredient for Perfect Flavor
Salt may seem like a minor ingredient, but it plays a crucial role in enhancing the chocolate flavor and balancing the sweetness.
Tip: A pinch of sea salt or Himalayan pink salt can add a subtle contrast to the sweetness, making the chocolate flavor stand out even more.
10. Optional Ingredients for Extra Flavor & Texture
Want to customize your Chocolate Heart Cake? Here are a few add-ins for extra indulgence:
- Chocolate Chips or Chunks: Melt slightly during baking, adding gooey pockets of chocolate throughout the cake.
- Nuts (Almonds, Walnuts, or Hazelnuts): Add a slight crunch and nutty flavor.
- Spices (Cinnamon, Cayenne, or Espresso Powder): A hint of warmth or spice enhances the depth of chocolate flavor.
Tip: If adding chocolate chips, coat them in a bit of flour before folding them into the batter to prevent them from sinking to the bottom.
Final Thoughts: Choosing the Right Ingredients for Success
Each ingredient in a Chocolate Heart Cake plays a crucial role in creating a rich, moist, and irresistible dessert. By carefully selecting high-quality cocoa powder, balancing fats and liquids, and using the right leavening agents, you can achieve a fluffy yet decadent cake that’s full of deep chocolate flavor.
Now that you know the essentials, gather your ingredients and bake the perfect heart-shaped chocolate cake for someone special—or just to treat yourself!
Best Tools for Baking Success: Essential Equipment for the Perfect Chocolate Heart Cake
Baking a Chocolate Heart Cake is more than just following a recipe—it’s about using the right tools to ensure a smooth process and a perfectly baked cake. Having the proper equipment saves time, improves accuracy, and helps achieve a light, moist, and evenly baked cake. Whether you’re a beginner or an experienced baker, investing in the right tools makes a significant difference in the quality of your cake.
Below is a list of essential tools that will set you up for baking success and help you create a flawless heart-shaped chocolate cake.
1. Heart-Shaped Cake Pan – The Star of the Show
To achieve the classic heart shape, a heart-shaped cake pan is essential.
- Best Material: Choose a non-stick metal pan for even heat distribution and easy cake release.
- Size Options: A 9-inch heart-shaped pan works well for most standard cake recipes.
- Alternatives: If you don’t have a heart-shaped pan, you can combine a square pan and a round pan—cut the round cake in half and attach the halves to the sides of the square cake to form a heart shape.
Pro Tip: To prevent sticking, always grease the pan with butter or cooking spray and dust it with cocoa powder (instead of flour) to keep the chocolate flavor intact.
2. Mixing Bowls – For Easy Ingredient Preparation
You’ll need at least two mixing bowls—one for dry ingredients and another for wet ingredients.
- Material Choices:
- Glass or Stainless Steel: Durable and doesn’t absorb odors.
- Plastic: Lightweight and easy to use, but can stain over time.
- Size Matters: A large mixing bowl is essential to prevent spills when combining ingredients.
Pro Tip: Use a medium-sized bowl for dry ingredients and a large bowl for wet ingredients to ensure even mixing without overworking the batter.
3. Electric Hand Mixer or Stand Mixer – For Perfectly Smooth Batter
Mixing cake batter by hand can be exhausting and uneven. A hand mixer or stand mixer helps achieve a smooth, lump-free batter with minimal effort.
- Hand Mixer: Great for everyday baking, easy to store, and effective for creaming butter and sugar.
- Stand Mixer: Ideal for heavy-duty baking, providing hands-free mixing with different speed settings.
Pro Tip: When mixing, start on a low speed to avoid splattering, then increase gradually for a silky batter. Overmixing can lead to a dense cake, so mix only until the ingredients are just combined.
4. Measuring Cups and Spoons – For Accuracy and Consistency
Precision is key in baking. Using the right measuring tools ensures the perfect ratio of ingredients.
- Dry Ingredients: Use measuring cups specifically designed for dry ingredients (flour, cocoa powder, sugar).
- Liquid Ingredients: Use a clear liquid measuring cup with a spout for easy pouring.
- Measuring Spoons: Essential for small ingredients like vanilla extract, baking soda, and salt.
Pro Tip: When measuring flour or cocoa powder, use the spoon-and-level method—spoon the ingredient into the cup and level it off with a knife for accuracy.
5. Whisk and Sifter – For Light, Airy Cake Batter
A whisk and sifter help create a lighter, more delicate cake texture.
- Sifter: Helps remove lumps in flour and cocoa powder, ensuring an evenly mixed batter.
- Whisk: Useful for gently mixing dry ingredients and incorporating air into the batter for a fluffier cake.
Pro Tip: Sift the cocoa powder and flour together to prevent clumping and ensure a smooth chocolate cake batter.
6. Spatula and Wooden Spoon – For Gentle Mixing and Scraping
- Silicone Spatula: Flexible and heat-resistant, perfect for scraping every bit of batter from the bowl.
- Wooden Spoon: Ideal for gently folding ingredients together without overmixing.
Pro Tip: Use a spatula to fold in dry ingredients gently to avoid knocking out air from the batter, which keeps the cake light and fluffy.
7. Baking Paper (Parchment Paper) – For Easy Cake Removal
Lining your cake pan with parchment paper prevents sticking and makes cleanup easier.
- How to Use It: Cut the parchment paper to fit the bottom of the heart-shaped pan.
- Non-Stick Benefits: Ensures the cake comes out smoothly without breaking or sticking to the pan.
Pro Tip: If you’re out of parchment paper, grease the pan with butter or oil and dust it with cocoa powder for a similar non-stick effect.
8. Cooling Rack – To Prevent a Soggy Cake
A cooling rack is essential to allow airflow around the cake, preventing condensation that can make the cake soggy.
- Why It’s Important: If a hot cake sits in the pan too long, it continues to bake, which can dry out the cake or make it dense.
- Best Practice: Let the cake cool in the pan for 10–15 minutes, then transfer it to a cooling rack for even air circulation.
Pro Tip: To prevent cracking, run a knife around the edges of the pan before flipping the cake onto the cooling rack.
9. Serrated Knife – For Even Layers
If you want to cut the cake into layers for filling, a serrated knife is your best tool for a clean, even cut.
- Best Use: Slice through the cake using a gentle sawing motion to avoid crumbling.
- Alternative: Use a cake leveler for precise cuts.
Pro Tip: Chill the cake in the fridge for 30 minutes before slicing—it firms up the cake, making it easier to cut evenly.
10. Cake Turntable and Offset Spatula – For Professional Frosting
- Cake Turntable: Helps in smoothly decorating and frosting the cake.
- Offset Spatula: Spreads frosting evenly for a professional-looking finish.
Pro Tip: For the smoothest frosting, apply a crumb coat first, chill the cake, and then apply the final frosting layer.
Final Thoughts: The Right Tools Make a Difference
Having the right baking tools makes making a Chocolate Heart Cake much easier. They ensure that the cake bakes evenly, has the perfect texture, and is beautifully decorated. Whether it’s a heart-shaped pan for the iconic look, a cooling rack to preserve moisture, or an offset spatula for a stunning finish, each tool plays a crucial role in baking success.
With these essentials in your kitchen, you’re all set to bake a show-stopping Chocolate Heart Cake that’s as delicious as it is beautiful!
Optional Add-ons for Extra Flavor: Elevate Your Chocolate Heart Cake
A Chocolate Heart Cake is already delicious on its own, but adding extra flavors and textures can take it to the next level. Whether you want to enhance the chocolatey richness, add a surprising twist, or make your cake more visually appealing, the right add-ons can make your dessert truly unforgettable.
From decadent fillings to crunchy toppings and infused flavors, here are some of the best ways to customize your Chocolate Heart Cake for a more luxurious and gourmet experience.
1. Decadent Fillings – Make Every Bite More Indulgent
A filling adds an extra layer of flavor, moisture, and surprise when you cut into the cake. Instead of leaving your cake plain, try slicing it in half and spreading one of these delicious fillings inside:
Chocolate-Based Fillings:
- Chocolate Ganache: A rich, silky ganache (made with melted chocolate and heavy cream) adds deep chocolate intensity.
- Nutella or Chocolate Hazelnut Spread: Brings a nutty, creamy twist to each bite.
- Chocolate Mousse: Light and airy, a mousse filling creates an elegant and melt-in-your-mouth texture.
Fruit-Based Fillings:
- Raspberry or Strawberry Jam: The sweet and tangy contrast of fruit jam pairs beautifully with chocolate.
- Fresh Berries with Whipped Cream: Adds a refreshing and juicy balance to the richness of chocolate.
- Orange Curd or Zest: Chocolate and citrus are a match made in heaven! Orange curd or zest brightens the flavor.
Caramel & Nutty Fillings:
- Salted Caramel Sauce: A drizzle of salted caramel between layers enhances the chocolate with a sweet-salty contrast.
- Peanut Butter or Almond Butter: A nutty layer gives a creamy, savory edge to your cake.
Pro Tip: If using a fruit-based filling, brush the cake layers with a simple syrup (equal parts sugar and water) before filling to keep the cake moist.
2. Irresistible Toppings – Elevate the Cake’s Look & Flavor
Toppings add the final touch of elegance and creativity to your Chocolate Heart Cake. Depending on the occasion, you can go for a minimalist look or create a showstopping masterpiece.
Classic Chocolate Toppings:
- Chocolate Drizzle: A simple melted chocolate drizzle makes the cake look glossy and professional.
- Cocoa Powder or Powdered Sugar Dusting: Lightly dusting the top with cocoa powder or powdered sugar gives it a sophisticated, bakery-style finish.
- Chocolate Shavings or Curls: These add texture, beauty, and an extra chocolate kick.
Fresh & Fruity Toppings:
- Strawberries, Raspberries, or Blueberries: Fresh fruit not only looks stunning but also cuts through the richness.
- Candied Orange Slices: A citrusy garnish that pairs beautifully with dark chocolate.
Nutty & Crunchy Toppings:
- Toasted Almonds, Hazelnuts, or Pecans: Add crunch and a slightly salty contrast to the sweet chocolate.
- Coconut Flakes: Brings a tropical twist that pairs well with dark chocolate.
Whipped Cream & Edible Decorations:
- Whipped Cream Swirls: Light and airy, whipped cream adds a delicate texture to each bite.
- Edible Flowers: Perfect for a romantic, floral aesthetic (roses, violets, or lavender are great choices).
- Gold Leaf or Edible Glitter: Makes the cake Instagram-worthy and luxurious.
Pro Tip: If adding fresh fruit, glaze them with a little warmed apricot jam to keep them shiny and fresh longer.
3. Infused Flavors – Add Complexity to the Cake
To make your Chocolate Heart Cake even more special, try infusing unique flavors into the batter or frosting.
Classic & Warm Flavors:
- Espresso Powder or Coffee: Enhances the chocolate flavor without making it taste like coffee.
- Vanilla Bean Paste: Adds a rich and aromatic depth.
- Cinnamon or Nutmeg: A pinch of warm spices can make the cake feel extra cozy and inviting.
Liqueur & Alcohol Infusions:
- Baileys Irish Cream: Adds a smooth, creamy hint to the frosting or batter.
- Grand Marnier or Orange Liqueur: Enhances the chocolate with a subtle citrusy warmth.
- Rum or Bourbon: A splash in the batter gives the cake a grown-up, sophisticated edge.
Exotic & Unique Flavors:
- Chili Powder or Cayenne Pepper: A small pinch can bring out the depth of chocolate and add a spicy kick!
- Rosewater or Lavender Extract: Brings a delicate floral aroma that makes the cake feel gourmet.
- Salt Flakes: Sprinkling flaky sea salt over chocolate frosting creates an irresistible sweet-salty contrast.
Pro Tip: When adding alcohol or spices, use them in moderation so they don’t overpower the chocolate flavor.
4. Fun & Creative Additions for a Unique Cake
If you want to make your Chocolate Heart Cake extra fun and personalized, try these creative ideas:
- Chocolate Truffles or Ferrero Rocher Candies: Arrange them on top for an elegant touch.
- Crushed Cookies (Oreo, Biscoff, or Graham Crackers): Sprinkle them over the frosting for extra crunch and flavor.
- Mini Marshmallows & Chocolate Chips: Great for a s’mores-inspired version.
- Colorful Sprinkles: Perfect for birthdays, anniversaries, or festive celebrations.
Pro Tip: Try pressing crushed cookies or nuts onto the sides of the cake for a stylish, textured look.
Final Thoughts: Customize Your Cake for Every Occasion
A Chocolate Heart Cake is incredibly versatile and easy to customize with these optional add-ons. Whether you prefer a classic chocolate cake or want to experiment with new flavors and textures, the right fillings, toppings, and infusions can make your cake even more special and memorable.
Step-by-Step Guide to Making the Perfect Chocolate Heart Cake
Preparing the Batter: The Foundation of a Perfect Chocolate Heart Cake
The batter is the heart of your Chocolate Heart Cake—it determines the texture, moisture, and flavor of the final product. A well-prepared batter ensures that your cake turns out soft, rich, and evenly baked, with a deep chocolatey taste and a perfect crumb. Whether you’re an experienced baker or a beginner, following the right mixing techniques and using high-quality ingredients will make all the difference.
In this section, we’ll walk through the step-by-step process of preparing the perfect batter, highlighting key techniques, tips, and common mistakes to avoid.
1. Gather and Measure Your Ingredients Accurately
Baking is a precise science, so measuring your ingredients correctly is crucial to achieving the right texture and consistency.
Essential Ingredients for the Batter:
- All-purpose flour – Provides structure to the cake.
- Cocoa powder – The key to a rich, deep chocolate flavor.
- Baking powder & baking soda – Work as leavening agents to make the cake rise.
- Salt – Enhances the chocolate flavor.
- Granulated sugar & brown sugar – Adds sweetness and moisture.
- Eggs – Helps bind the ingredients and create a smooth texture.
- Butter & vegetable oil – Butter for richness, oil for moisture.
- Milk or buttermilk – Ensures a soft and tender crumb.
- Vanilla extract – Enhances the overall flavor.
- Hot coffee or hot water – Intensifies the chocolate flavor and keeps the cake moist.
Pro Tip: Bring all ingredients to room temperature before you start. This ensures they mix evenly and create a smooth batter without lumps.
2. Sift the Dry Ingredients for a Light, Lump-Free Batter
Sifting the flour, cocoa powder, baking powder, and salt before mixing helps prevent lumps and ensures an even distribution of ingredients.
How to Sift Dry Ingredients Properly:
- Place a fine-mesh sieve or sifter over a mixing bowl.
- Add the flour, cocoa powder, baking powder, and salt.
- Gently tap or shake the sieve to allow the ingredients to pass through.
- Repeat once for an ultra-light and airy cake texture.
Pro Tip: If you don’t have a sifter, use a whisk to mix the dry ingredients well.
3. Cream the Butter and Sugar for a Smooth, Airy Texture
This step is key to creating a light and tender cake. Creaming incorporates air into the batter, resulting in a fluffier cake.
How to Cream Butter and Sugar:
- In a large mixing bowl, add softened butter and both granulated and brown sugar.
- Use a hand mixer or stand mixer on medium speed to beat the mixture until it becomes pale, fluffy, and light (about 2–3 minutes).
- Scrape down the sides of the bowl to ensure even mixing.
Pro Tip: Creaming takes longer if the butter is too cold. To soften butter quickly, cut it into small pieces and let it sit at room temperature for 15 minutes or microwave it for 10 seconds (be careful not to melt it).
4. Add Eggs One at a Time for Stability
Eggs help bind the ingredients together and contribute to the cake’s texture.
How to Add Eggs Properly:
- Crack one egg at a time into the batter.
- Beat on low speed until fully incorporated before adding the next.
- Scrape the sides of the bowl after each addition to ensure a smooth mixture.
Pro Tip: If your batter looks curdled, don’t worry! It will smooth out once you add the dry ingredients.
5. Alternating Wet and Dry Ingredients for a Balanced Batter
Instead of adding all the dry and wet ingredients at once, alternate them for a well-balanced, lump-free batter.
Step-by-Step Mixing Process:
- Add ⅓ of the sifted dry ingredients to the butter-sugar-egg mixture.
- Mix on low speed until just combined.
- Pour in half of the milk (or buttermilk) and mix gently.
- Repeat the process: add another ⅓ of the dry ingredients, then the remaining milk.
- Finish by adding the last ⅓ of the dry ingredients.
Pro Tip: Mix just until combined! Overmixing can lead to a dense, chewy cake instead of a soft, fluffy one.
6. The Secret Ingredient: Hot Coffee or Hot Water
One of the best-kept secrets for an extra moist and rich chocolate cake is adding hot coffee or hot water to the batter.
Why It Works:
- The heat helps bloom the cocoa powder, intensifying the chocolate flavor.
- Coffee enhances the depth of the chocolate without making the cake taste like coffee.
- The hot liquid creates a thinner, more fluid batter, resulting in a moist, tender crumb.
How to Incorporate It:
- Heat ½ cup of water or brewed coffee until very hot but not boiling.
- Slowly pour it into the batter while stirring continuously.
- The batter will become thin, but that’s normal—this helps create a super moist cake.
Pro Tip: If you don’t want to use coffee, hot water with a teaspoon of instant espresso powder works just as well.
7. Final Check: Ensure a Silky-Smooth Batter
Before pouring the batter into the pan, give it a final check to ensure it’s smooth and well-mixed.
Things to Look For:
The batter should be thin and pourable but not watery.
No visible streaks of flour—it should be fully incorporated.
It should have a shiny, velvety texture.
Pro Tip: Use a spatula to fold the batter a few times before pouring to catch any unmixed pockets of flour.
Final Thoughts: Preparing the Perfect Batter for a Flawless Cake
Getting the batter right is one of the most important steps in baking a Chocolate Heart Cake. When you follow these key techniques—measuring accurately, creaming butter and sugar, alternating wet and dry ingredients, and adding hot liquid at the end—you ensure a cake that is moist, rich, and perfectly textured.
Once your batter is ready, pour it into your heart-shaped cake pan and bake it to perfection!
Baking the Cake to Perfection
Once your Chocolate Heart Cake batter is prepared, the next crucial step is baking it to perfection. Baking is a delicate process that requires precision in temperature, timing, and technique to ensure the cake turns out moist, fluffy, and evenly baked. Proper baking prevents dryness, sinking, cracking, or uneven cooking, all of which can affect the final texture and taste. By following these steps, you’ll achieve a perfectly baked cake every time.
1. Preheat the Oven for an Even Bake
Preheating the oven is one of the most important steps in baking a cake. It ensures that the oven reaches the correct temperature before the batter goes in, allowing for an even and consistent bake.
- Set your oven to 350°F (175°C) and let it preheat for at least 10–15 minutes. This ensures that the heat is evenly distributed and prevents temperature fluctuations that could cause the cake to bake unevenly.
- If your oven has a convection setting, turn it off for baking. Convection ovens circulate air, which can cause cakes to bake too quickly on the outside while remaining undercooked in the center.
- Use an oven thermometer to verify the correct temperature, as oven dials can sometimes be inaccurate.
Pro Tip: If you have had issues with uneven baking in the past, consider rotating the cake halfway through baking. However, avoid opening the oven door too frequently, as sudden drops in temperature can cause the cake to collapse.
2. Prepare Your Cake Pan Properly
A well-prepared cake pan prevents sticking and ensures an even bake. A heart-shaped cake pan is ideal for this recipe, but you can also use a round and square pan combination to create a heart shape.
- Grease the pan thoroughly with butter or non-stick baking spray, ensuring all sides and corners are coated.
- Dust the pan with cocoa powder instead of flour. This keeps the chocolate flavor intact and prevents a white residue on the cake.
- Line the bottom of the pan with parchment paper to make cake removal even easier. If using a heart-shaped pan, trace and cut the parchment paper to fit the bottom perfectly.
Pro Tip: If you don’t have a heart-shaped pan, use a 9-inch round cake pan and an 8-inch square pan. Cut the round cake in half and position the halves along the sides of the square cake to form a heart.
3. Pour the Batter Evenly and Release Air Bubbles
Once your pan is prepared, pour the cake batter slowly and evenly into the pan. This helps prevent air pockets and ensures the cake bakes uniformly.
- Use a spatula to spread the batter evenly across the pan, especially if using a uniquely shaped mold, such as a heart.
- To remove excess air bubbles, gently tap the cake pan on the counter a few times before placing it in the oven.
- Avoid overfilling the pan—fill it only two-thirds full to allow space for the cake to rise properly without overflowing.
Pro Tip: If you’re using multiple cake pans, distribute the batter evenly by weighing them on a kitchen scale to ensure equal amounts in each pan.
4. Bake at the Right Temperature and Time
A perfectly baked Chocolate Heart Cake requires careful attention to time and temperature.
- Bake at 350°F (175°C) for 25–30 minutes.
- The baking time may vary depending on your oven and the size of your cake pan.
- Check the cake at the 20-minute mark to monitor progress. If it looks fully set but still wobbly in the center, continue baking in 5-minute increments until done.
- If the cake is browning too quickly but is still underbaked, loosely cover it with aluminium foil to prevent over-browning while allowing the inside to finish baking.
Pro Tip: If your oven has hot spots (certain areas that cook faster than others), carefully rotate the cake pan halfway through baking to ensure even cooking.
5. Check for Doneness Without Overbaking
Overbaking can lead to a dry or crumbly cake while underbaking results in a gummy, dense texture. Use these simple methods to check if your cake is perfectly baked:
- Toothpick Test: Insert a toothpick or skewer into the center of the cake. If it comes out clean or with a few moist crumbs, the cake is done. If there is wet batter on the toothpick, bake for a few more minutes and check again.
- Spring Test: Gently press the center of the cake with your finger. If it springs back and doesn’t leave an indentation, it’s ready. If it sinks slightly, it needs more time.
- Visual Clues: The edges of the cake will slightly pull away from the sides of the pan when fully baked. The top should look set and slightly domed without excessive cracks.
Pro Tip: If baking multiple cake layers, check each one individually, as some may bake faster than others, depending on their position in the oven.
6. Cooling the Cake Properly Before Removing It from the Pan
Cooling is just as important as baking! A cake that is removed from the pan too soon may break apart, and leaving it in the pan for too long can cause it to become dense or soggy.
- Let the cake cool in the pan for 10–15 minutes before removing it. This allows it to be set and makes removal easier.
- Run a knife along the edges of the cake to loosen it from the pan.
- Carefully flip the cake onto a wire cooling rack and let it cool completely for at least 30–60 minutes before decorating.
- If you need to speed up the cooling process, place the cake in the refrigerator for 30 minutes after it reaches room temperature.
Pro Tip: For an ultra-moist cake, wrap the cooled cake in plastic wrap and let it rest for a few hours or overnight. This helps lock in moisture, making it easier to slice and frost.
7. Troubleshooting Common Baking Issues
Even experienced bakers can encounter issues when baking a cake. Here’s how to fix the most common problems:
- Cake Sinks in the Middle: The oven temperature may be too low, or the cake was underbaked. Ensure the oven is fully preheated, and avoid opening the oven door too soon.
- Dry or Crumbly Cake: Overbaking or too much flour can cause dryness. Always measure ingredients carefully and remove the cake from the oven as soon as it passes the doneness tests.
- Uneven Baking or Dome-Shaped Cake: If the edges bake faster than the center, the oven may be too hot, or the cake pan isn’t properly positioned. Try using an oven thermometer and placing the cake on the middle rack for even heat distribution.
- Cake Sticks to the Pan: This can happen if the pan isn’t greased properly. Next time, use parchment paper and dust the pan with cocoa powder.
Final Thoughts: Achieving the Perfect Bake Every Time
Baking a Chocolate Heart Cake to perfection requires attention to detail, proper temperature control, and careful cooling techniques. By following these steps, you’ll achieve a cake that is light, fluffy, and rich in chocolate flavor, with an even bake and a moist crumb.
Now that your cake is perfectly baked and cooled, it’s time for the exciting part—decorating and adding the final touches!
Decorating Ideas to Make Your Chocolate Heart Cake Stand Out
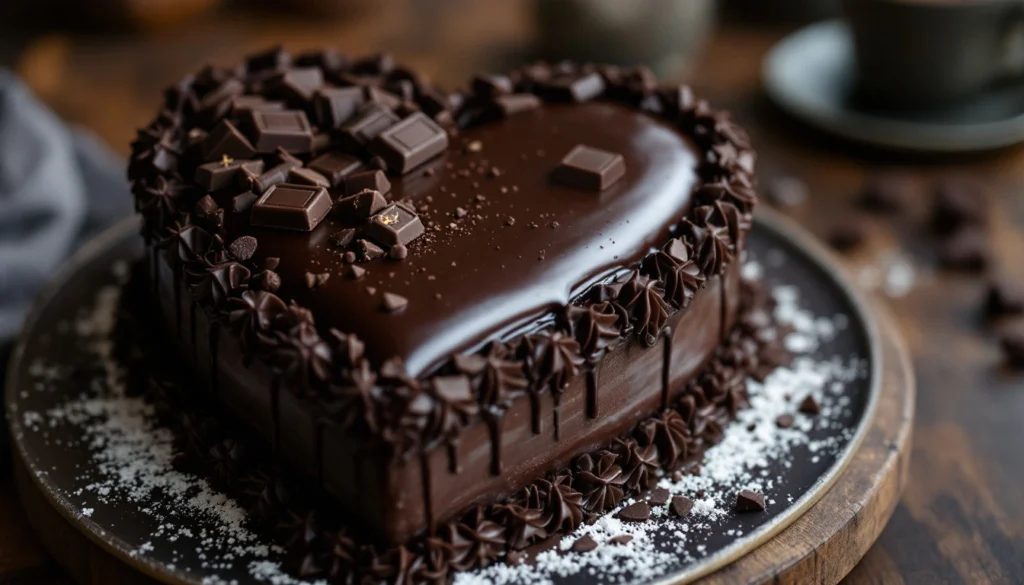
Classic Ganache Drizzle: The Perfect Finishing Touch for Your Chocolate Heart Cake
A classic ganache drizzle is the ultimate way to elevate your Chocolate Heart Cake. This rich, glossy, and silky-smooth chocolate topping adds depth, flavor, and a luxurious texture to your cake. Whether you want a thin, elegant drizzle or a thick, decadent glaze, mastering the perfect ganache ensures a professional-looking and irresistibly delicious dessert.
Ganache is made with just two simple ingredients—chocolate and heavy cream—but the technique behind making it can determine whether it turns out velvety smooth or grainy and thick. Let’s explore how to create the perfect ganache drizzle and different ways to use it to enhance your Chocolate Heart Cake.
1. Ingredients for a Perfect Chocolate Ganache Drizzle
The quality of the ingredients you use directly affects the texture and taste of your ganache. Here’s what you’ll need:
- Chocolate (6 oz / 170g) – Choose high-quality semi-sweet or dark chocolate (at least 60% cocoa) for a rich, intense flavor.
- Heavy Cream (½ cup / 120ml) – Provides a silky texture and helps create the perfect consistency.
- Optional Add-ins:
- Vanilla Extract (½ tsp) – Enhances the chocolate flavor.
- Butter (1 tbsp) – Adds extra shine and smoothness to the ganache.
- Salt (a pinch) – Balances the sweetness and deepens the flavor.
- Espresso Powder (¼ tsp) – Intensifies the chocolate taste without making it taste like coffee.
Pro Tip: Avoid using chocolate chips, as they contain stabilizers that prevent smooth melting. Instead, use a chocolate bar or couverture chocolate, finely chopped for even melting.
2. Step-by-Step Guide to Making a Classic Ganache Drizzle
Step 1: Chop the Chocolate for Even Melting
Finely chop your chocolate into small, uniform pieces. This will allow it to melt evenly and prevent lumps in the ganache. Place the chopped chocolate in a heatproof mixing bowl.
Step 2: Heat the Heavy Cream
Pour the heavy cream into a small saucepan and heat it over medium heat until it just starts to simmer (small bubbles forming around the edges). Do not let it boil, as overheating can scorch the cream and create a grainy texture.
Step 3: Combine and Let It Sit
Pour the hot cream over the chopped chocolate and let it sit undisturbed for 2–3 minutes. This allows the heat to melt the chocolate gradually.
Step 4: Stir Until Smooth
After letting the mixture sit, use a whisk or spatula to gently stir the chocolate and cream together. Start from the center and work outward in circular motions until the ganache becomes smooth and glossy. If the chocolate isn’t fully melted, microwave the mixture in 5-second bursts, stirring in between until fully combined.
Step 5: Adjust the Consistency (If Needed)
- For a thicker ganache: Let it sit at room temperature for 10–15 minutes or chill it in the fridge for a few minutes before using.
- For a thinner, pourable drizzle: Add 1–2 tablespoons of warm cream and stir until the desired consistency is reached.
Pro Tip: If your ganache looks grainy, add 1 teaspoon of warm milk and whisk it until smooth.
3. How to Drizzle Ganache Like a Pro
A ganache drizzle should be applied when it’s warm but not hot—this ensures a smooth flow without melting the cake’s surface.
- Use a spoon or small ladle to scoop the ganache.
- Hold it about 3–4 inches above the cake and gently drizzle in a zigzag or spiral motion.
- Let the ganache drip naturally over the edges for an effortless, artistic look.
- Pour the ganache into a piping bag or squeeze bottle.
- Pipe thin drizzles along the edges of the cake, allowing controlled drips to form.
- Fill the center of the cake with more ganache, using a spatula to spread it evenly.
Achieve a smooth, glossy finish by pouring warm ganache over the entire cake for a flawless coating.
- Place the cake on a cooling rack with parchment paper underneath to catch excess ganache.
- Pour the ganache directly over the top, using an offset spatula to gently spread it toward the edges.
- Allow it to drip naturally for a sleek, professional look.
Pro Tip: If you want perfect drips, chill the cake for 10–15 minutes before applying the ganache. A cold surface helps control the flow of drips.
4. Creative Variations to Enhance the Ganache
While classic ganache is already delicious, adding a twist can make your cake even more special.
Flavored Ganache Variations
- Salted Caramel Ganache: Stir in 2 tbsp of caramel sauce and a pinch of sea salt for a sweet-salty contrast.
- Orange Chocolate Ganache: Add 1 tsp of orange zest and a dash of Grand Marnier for a citrusy kick.
- Peppermint Ganache: Stir in ½ tsp of peppermint extract for a refreshing holiday-inspired touch.
- Spicy Mexican Chocolate Ganache: Add ¼ tsp cinnamon and a pinch of cayenne pepper for a warm, spicy depth.
Decorative Ganache Toppings
Once the ganache is set, you can add:
- Chocolate shavings for an extra chocolatey touch.
- Gold leaf or edible glitter for a luxurious look.
- Chopped nuts (almonds, hazelnuts, or pecans) for crunch.
- Fresh berries to balance the richness.
Pro Tip: For a mirror glaze effect, use an immersion blender to mix the ganache for a super-smooth, air-bubble-free finish.
5. Storing and Reusing Leftover Ganache
If you have leftover ganache, don’t throw it away! You can store it and repurpose it in creative ways.
- At Room Temperature: Keep in an airtight container for up to 2 days.
- Refrigerated: Store in the fridge for up to 1 week. Reheat gently before using.
- Frozen: Freeze in a sealed container for up to 3 months. Thaw overnight in the fridge and warm before use.
Ways to Use Leftover Ganache
- Chocolate Truffles: Roll chilled ganache into balls and coat with cocoa powder.
- Hot Chocolate Base: Stir a spoonful into warm milk for a decadent hot chocolate.
- Frosting or Whipped Ganache: Let it cool and whip it with a mixer for a light, fluffy frosting.
- Dipping Sauce: Use for dipping fruits, cookies, or marshmallows.
Final Thoughts: A Simple Yet Elegant Ganache Drizzle
A classic ganache drizzle transforms your Chocolate Heart Cake into a masterpiece, adding richness, elegance, and an indulgent finishing touch. Whether you prefer a casual drizzle, a controlled drip, or a full cake glaze, ganache enhances both the look and taste of your dessert.
Now that your cake is beautifully drizzled with ganache, it’s time to add final decorations and serve your masterpiece!
Whipped Cream & Berry Topping: A Light and Elegant Finish
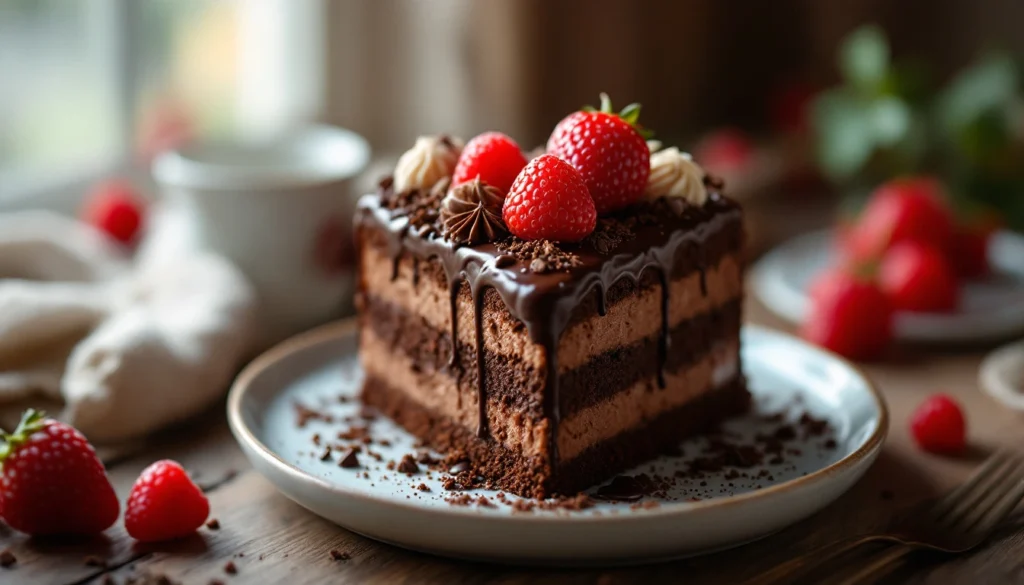
Adding a whipped cream and berry topping to your Chocolate Heart Cake creates a beautiful, refreshing, and delicious contrast to the rich chocolate flavor. The light and airy texture of whipped cream balances the dense and moist cake, while fresh berries add a juicy, slightly tart burst of flavor that complements the sweetness of the cake. This topping is ideal for occasions like Valentine’s Day, anniversaries, birthdays, or even casual gatherings where you want to impress with a simple yet elegant dessert.
1. Making the Perfect Whipped Cream
Homemade whipped cream is easy to make and far superior to store-bought versions. It has a fresh, creamy texture without artificial stabilizers.
Ingredients for Homemade Whipped Cream:
- 1 cup (240ml) heavy whipping cream – Use full-fat heavy cream for the best texture.
- 2 tablespoons powdered sugar – Adds sweetness while keeping the cream light.
- 1 teaspoon vanilla extract – Enhances the flavor with a warm, sweet aroma.
Steps to Prepare the Whipped Cream:
- Chill your mixing bowl and beaters in the freezer for 10–15 minutes before starting. Cold equipment helps the cream whip up faster.
- Pour the cold heavy cream into the chilled bowl.
- Use a hand mixer or stand mixer at medium to high speed and beat the cream until it starts to thicken.
- Add the powdered sugar and vanilla extract, then continue beating until soft peaks form (the cream should be thick but still fluffy and spreadable).
- Be careful not to overwhip—overbeaten cream turns into butter!
Pro Tip: If you need whipped cream to hold its shape longer (for piping or decorating), add 1 tablespoon of cornstarch or cream cheese while whipping.
2. How to Decorate with Whipped Cream
Whipped cream can be used in different ways to decorate your Chocolate Heart Cake beautifully.
- Rustic Swirl Topping: Using a spatula, spread a thick layer of whipped cream over the cake for a soft, homemade look.
- Piped Whipped Cream Borders: Use a piping bag fitted with a star tip to create elegant swirls or rosettes along the edges.
- Dollops & Garnishes: Spoon small dollops around the cake and top each with berry or chocolate shaving.
Pro Tip: If you’re serving the cake later, chill it after adding whipped cream to keep it fresh and prevent melting.
3. Choosing the Best Berries for Topping
Berries not only add color and elegance but also provide a refreshing contrast to the rich chocolate. Here are some of the best berry options:
- Strawberries: A classic pairing with chocolate—slice them or use whole strawberries for decoration.
- Raspberries: Slightly tart, they add a bold red color and a burst of freshness.
- Blueberries: Small and sweet, they add a vibrant pop of color.
- Blackberries: Juicy and slightly tangy, they contrast well with chocolate.
Creative Ways to Arrange Berries on the Cake:
- Heart-Shaped Design: Arrange sliced strawberries in the shape of a heart for a romantic touch.
- Mixed Berry Cascade: Place a mix of berries in the center and let them naturally spill over the sides.
- Chocolate-Dipped Berries: Dip strawberries or raspberries in melted chocolate before placing them on top for a double chocolate effect.
Pro Tip: Lightly glaze the berries with warmed apricot jam for a glossy, professional finish.
Personalized Messages & Sprinkles: Adding a Fun and Special Touch
A Chocolate Heart Cake becomes even more special when you add a personalized message or colorful sprinkles. Whether celebrating a birthday, anniversary, or holiday, adding a message makes your cake memorable and heartfelt.
1. Writing Messages on the Cake
A custom message on the cake is a wonderful way to make it more personal and meaningful. Whether you write “Happy Birthday,” “I Love You,” “Be Mine,” or a special name, it transforms your cake into a thoughtful masterpiece.
Best Ways to Write on a Cake:
- Piped Chocolate or Frosting: To write elegant, cursive messages, use a piping bag with a fine tip filled with melted chocolate, ganache, or buttercream.
- White or Dark Chocolate Drizzle: Drizzle melted white or dark chocolate over the cake in a handwritten style.
- Royal Icing or Fondant Letters: For a more structured look, cut out letters from fondant or pipe them with royal icing.
- Stencil with Powdered Sugar or Cocoa: Place a stencil on the cake and dust it with powdered sugar or cocoa powder to reveal a soft, delicate message.
🔹 Pro Tip: If you’re new to piping, practice writing your message on parchment paper first to get comfortable with the motion.
2. Fun and Festive Sprinkles for Any Occasion
Sprinkles add a playful, festive, and colorful touch to your cake, making it perfect for celebrations. Choose sprinkles that match the occasion:
- Valentine’s Day: Heart-shaped sprinkles, red and pink sugar crystals.
- Birthdays: Rainbow sprinkles, metallic gold or silver dragees.
- Anniversaries or Weddings: Pearl sprinkles, edible glitter, gold leaf accents.
- Holidays: Red and green sprinkles for Christmas, pastel confetti for Easter.
Creative Ways to Use Sprinkles:
- Sprinkle Borders: Apply a layer of sprinkles around the edges of the cake for a fun contrast.
- Confetti Effect: Gently press sprinkles onto the sides of the cake to create a gradient sprinkle effect.
- Sprinkle Heart Design: Use a heart-shaped stencil, fill it with sprinkles, and gently remove the stencil to reveal the design.
Pro Tip: Lightly brush the cake with a thin layer of honey or simple syrup before adding sprinkles to help them stick better.
Final Thoughts: Elevate Your Chocolate Heart Cake with Style
Combining whipped cream, fresh berries, personalized messages, and festive sprinkles makes your Chocolate Heart Cake more visually stunning and irresistibly delicious. These simple yet elegant decorations transform a classic chocolate cake into a showstopping dessert that is perfect for any special occasion.
- For a romantic look: Use piped whipped cream, strawberries, and a handwritten chocolate message.
- For a fun and festive celebration, Decorate with rainbow sprinkles, colourful frosting, and playful designs.
- For a luxurious touch: Add gold leaf, pearl sprinkles, and chocolate-dipped berries.
With these decorative touches, your Chocolate Heart Cake will not only taste amazing but also look stunning and personalized—a true dessert made with love!
Conclusion:
Baking a Chocolate Heart Cake is more than just making a dessert—it’s about creating a special moment filled with love, flavor, and joy. Whether you’re making this cake for Valentine’s Day, an anniversary, a birthday, or simply to indulge in something sweet, the combination of rich chocolate, a moist texture, and elegant decorations makes it a showstopping treat.
By following this step-by-step guide, you’ve learned how to:
Prepare the perfect batter for a soft, fluffy, and chocolatey cake.
Bake it to perfection, ensuring even texture and moisture.
Enhance it with delicious toppings like ganache, whipped cream, and fresh berries.
Personalize it with sprinkles and heartfelt messages to make it truly unique.
With a little love and creativity, your Chocolate Heart Cake will not only look stunning but also taste incredible, making every bite a delightful experience. Now it’s time to share your masterpiece—serve it to loved ones, snap a picture for social media, or simply enjoy a slice yourself!
Recipe Card: Chocolate Heart Cake
Want to Make the Perfect Chocolate Heart Cake? Try This Recipe!
Ingredients
Cake Batter
- 1 ½ cups all-purpose flour (or cake flour for a softer texture)
- ½ cup unsweetened cocoa powder (Dutch-processpreferred)
- 1 tsp baking powder
- 1 tsp backing soda
- 1 tsp salt
- ¾ cup sugar
- ½ cup brown sugar
- ½ cup unsalted butter (softened)
- ⅓ cup vegetable oil
- 2 large eggs (room temperature)
- 1 tsp vanilla extract
- ¾ cup buttermilk
- ½ cup hot brewed coffee (enhances chocolate flavor)
Chocolate Buttercream Frosting:
- 1 cup unsalted butter (softened)
- 3 cups confectioners' sugar (powdered sugar)
- ½ cup unsweetened cocoa powder
- ¼ CUP heavy cream or milk
- 1 tsp vanilla extract
- 1 pinch Of salt
Chocolate Ganache (Optional)
- 1 cup dark chocolate (chopped)
- ½ cup heavy cream
Instructions
- Step 1: Prepare the Heart-Shaped CakePanPreheat oven to 325°F (163°C).Grease and line a heart-shaped cake pan with parchment paper.
- Step 2: Mix the Dry Ingredients3️ In a bowl, whisk flour, cocoa powder, baking powder, baking soda, and salt.
- Step 3: Make the Batter In another bowl, cream butter,granulated sugar, and brown sugar until light and fluffy.5️ Beat in eggs one at a time,then add vanilla extract.6️ Mix in oil and buttermilk until combined.7️ Gradually add dry ingredients while mixing on low speed.8️ Stir in hot brewed coffee until the batter is smooth.
- Step 4: Bake the CakePour the batter into the heart-shaped pan and smooth the top. Bake for 30-35 minutes, or untila toothpick inserted in the center comes out with a few moist crumbs. Let the cake cool in the pan for 10minutes, then transfer to a wire rack to cool completely
- Step 5: Make the FrostingBeat butter, powdered sugar, cocoa powder, and salt untilfluffy.11 Add vanilla extract and heavy cream (one tablespoon at a time) untilsmooth.
- Step 6: Frost & Decorate the CakeOnce the cake is cool, spread a thin crumb coat of frostingand chill for 15 minutes.1️3 Frost the cake evenly with buttercream, using an offset spatula.1️4 If using ganache, melt chocolate and heavy cream together, let it cool slightly, then drizzle over the cake.1️5 Decorate with chocolate shavings,fresh berries, or edible flowers.
- Notes & Variations: Substitutions: Swap buttermilk for plain . Egg-Free Version: Use ½ cup unsweetened applesauce instead of eggs. Low-Sugar Option: Replace sugar with coconut sugar or a sugar substitute. Make It Ahead: Bake the cake a day before and store in an airtight container.