Love yogurt in the morning? Then you’ll love how easy it is to make your own. Most store options are full of added sugar and processed flavoring, but homemade Greek yogurt keeps it simple—just milk, culture, and time. You end up with a creamy, wholesome yogurt that’s fresh, affordable, and made the way it should be.
You can make thick Greek-style yogurt with things you already have. Warm milk to about 180°F, let it cool to roughly 110°F, whisk in a spoon or two of plain yogurt, then leave it somewhere gently warm. That’s the whole setup. After it sets, strain it until it looks glossy and holds soft peaks. The flavor lands clean and tangy, and the texture is thicker than most of the yogurt cups at the store.
Making it yourself also means you decide what goes in—no added sweeteners or thickeners—just milk and live cultures that may support a healthy gut. Strain a little for a softer scoop or longer for a spreadable finish. Batch it on Sunday and you’ve got breakfasts and snacks for the week without paying for individual cups.
Whether you’re watching your protein intake, trying to cut processed food, or just want to know exactly what’s in your breakfast, this recipe fits right in. It’s high in protein, naturally low in carbs, and an excellent base for everything from quick snacks to meal-prep breakfasts.
So if you’re ready to take charge of what’s in your bowl, skip the store aisle and try this out yourself. You’ll end up with yogurt that tastes real, feels good in your body, and might just become your new favorite kitchen habit.
Why Make Greek Yogurt at Home?
Healthier Than Store-Bought Options
Choosing to follow a Greek yogurt recipe at home gives you more than just a creamy texture—it gives you peace of mind. Many tubs on the shelf list added sugar, stabilizers, or flavors. When you make Greek yogurt at home, it’s just milk and live cultures, nothing extra.
Fewer Ingredients, More Nutrition
When you make yogurt yourself, you know what is in it; the ones you buy at the store include unnecessary preservatives, sweeteners, and stabilizers. Even brands that look healthy on the label can be surprisingly high in sugar.
In contrast, a homemade yogurt recipe uses just two ingredients—milk and a yogurt starter. That’s it. No hidden additives, no fillers—just simple, nourishing food made right in your kitchen.. This allows the probiotics to flourish naturally, giving your gut the support it needs without extra junk.
Better for Your Gut and Your Goals
A lot of people eat yogurt for the probiotics, but not every store brand actually delivers them. Some get heated again after they’re done fermenting, which wipes out most of the good bacteria. Others barely have enough good bacteria to make a difference.
When you make Greek yogurt yourself, you get to decide how long it ferments, which directly affects how strong and active those probiotics are. That means more of the good stuff that supports a healthy digestive rhythm.
And because homemade Greek yogurt is naturally higher in protein and lower in carbs—especially once it’s strained- it fits perfectly into clean eating, keto, or low-carb routines. You end up with a yogurt that actually supports your body and tastes fresher, thicker, and more satisfying than anything you can buy in a tub.
Budget-Friendly and Customizable
Making your own Greek yogurt at home isn’t just good — it’s also good for your wallet. Those small tubs of Greek yogurt at the store can get expensive, especially if you eat them daily. When you follow a simple Greek yogurt recipe at home, you get the same thick, creamy texture for a fraction of the cost. It’s a small habit that saves money week after week while giving you a fresher, cleaner yogurt you can feel good about eating.
Save Money with Every Batch
A single container of high-quality Greek yogurt from the store can cost three to four times more than the same amount made at home. By using just milk and a yogurt starter, you can create large batches of creamy yogurt for a fraction of the price.
Plus, if you reserve a few spoonfuls from each batch to use as your next starter, your cost goes down even more over time. It’s a cost-effective, low-waste option that’s perfect for families, meal-preppers, or anyone who enjoys yogurt regularly.
Here’s how yogurt saves money:
- Use bulk or store-brand milk for large batches
- Skip premium brands and additives
- Make multiple servings for the cost of one
Make It Your Own—Your Way
Another great reason to make Greek yogurt at home is that you can make it exactly the way you like it. If you want it extra thick and creamy, just strain it a bit longer. If you prefer a lighter, milder taste, shorten the fermentation time. You can even swap the milk—use whole, low-fat, lactose-free, or go dairy-free with coconut or almond milk.
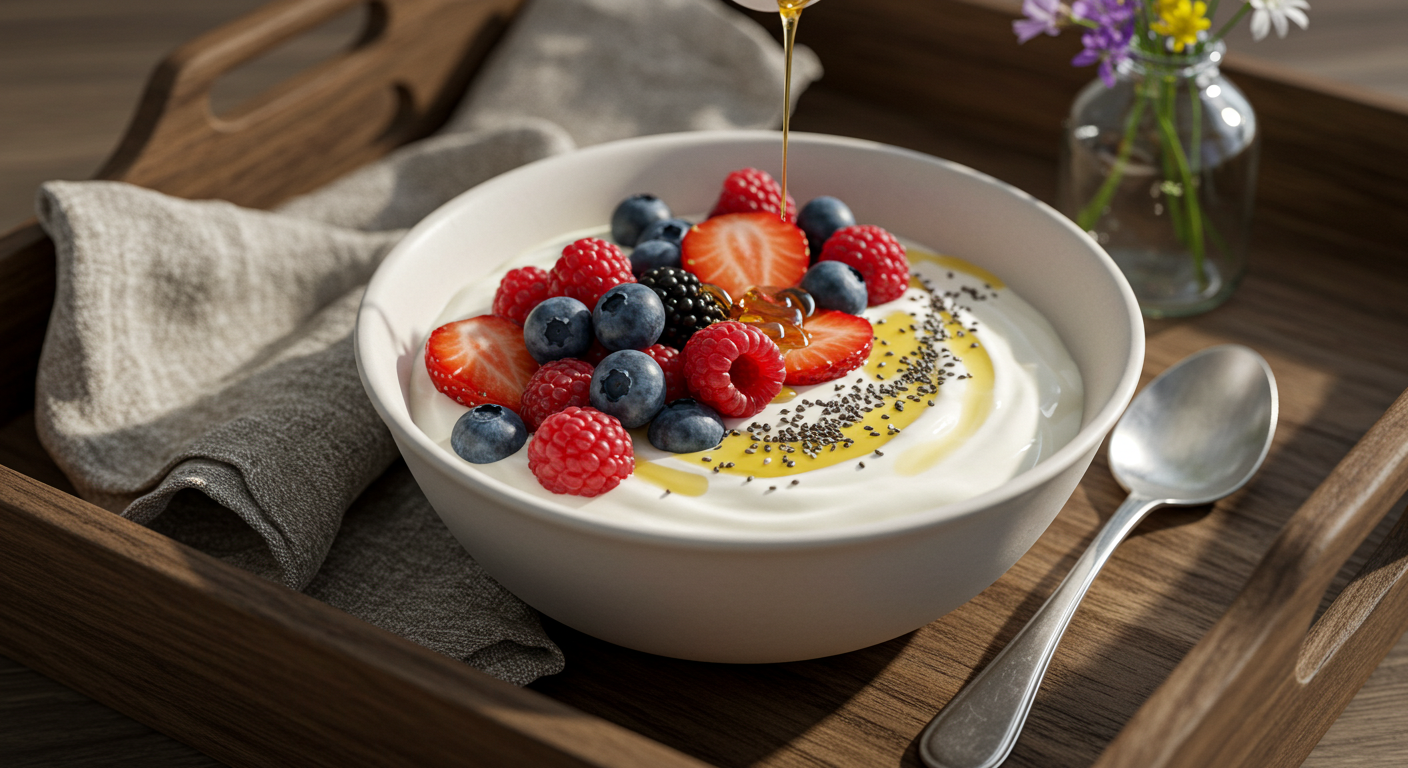
Once the base is ready, the fun part begins. Drizzle in some honey or a splash of vanilla. Toss in your favorite fruit or a bit of cinnamon for warmth. The best part is, you’re not limited to what’s sold in stores—you can make it just the way you like it.
Ingredients & Tools You’ll Need
Basic Ingredients for Perfect Yogurt
One of the best things about making your Greek yogurt recipe is how simple the ingredient list really is. You don’t need anything fancy—just a few core items that work together to create that creamy, tangy texture we all love. By starting with quality ingredients, your homemade yogurt will taste better and be more consistent every time.
Start with the Right Milk
Milk choice matters for texture and flavor. Each type gives your yogurt a different texture and taste. Whole milk makes it thick, creamy, and smooth — the kind of yogurt that feels almost like dessert. It’s my go-to for that classic Greek-style result.
If you prefer something lighter, 2% milk still works fine, though it comes out a bit thinner. You can also go with lactose-free milk if dairy usually upsets your stomach. And for anyone avoiding dairy altogether, plant-based options like coconut or almond milk can work too — just remember they need a special yogurt starter to ferment properly.
Here’s a quick rundown of what usually works best:
- Whole milk – gives rich, creamy results
- 2% or skim – lighter but still smooth
- Lactose-free milk – a gentle choice if regular dairy tends to upset your stomach
- Plant-based milks – work too, just make sure you’re using a culture made for non-dairy yogurt
The Power of a Good Starter
Once you’ve chosen your milk, the next essential ingredient is your yogurt starter—this is what introduces the live, active cultures that make fermentation possible. A plain, unsweetened yogurt with live and active cultures is ideal for your first batch. After that, you can save a spoonful of your homemade yogurt to use as the starter for the next one.
This simple step ensures that your easy yogurt recipe is full of gut-healthy probiotics and helps give your yogurt that distinct tang and smooth consistency.
Tips for the best starter:
- Look for “live and active cultures” on the label
- Avoid flavored or sweetened yogurts as starters
- Use roughly two to three tablespoons of yogurt for every quart of milk
With just two ingredients—milk and starter—you’re already on your way to making thick, creamy, probiotic-rich Greek yogurt at home. It’s natural, cost-effective, and surprisingly simple.
Optional Add-Ins for Extra Flavor
One of the best parts of making your Greek yogurt recipe is that you get to decide exactly how it tastes. The plain version is already creamy and a little tangy, but a few small add-ins can really change the flavor and make it more exciting. Whether you prefer sweet, fruity, or even savory flavors, the options are endless—and fully customizable to your taste.
Sweet and Natural Flavor Boosts
Sweeten right before you eat so the flavor stays bright.
- Drizzle honey or maple on top
- Splash in vanilla and give it a quick stir
- Dust with cinnamon or nutmeg
You get a creamy bowl with clean flavors in under a minute.
Fresh Additions for Variety and Nutrition
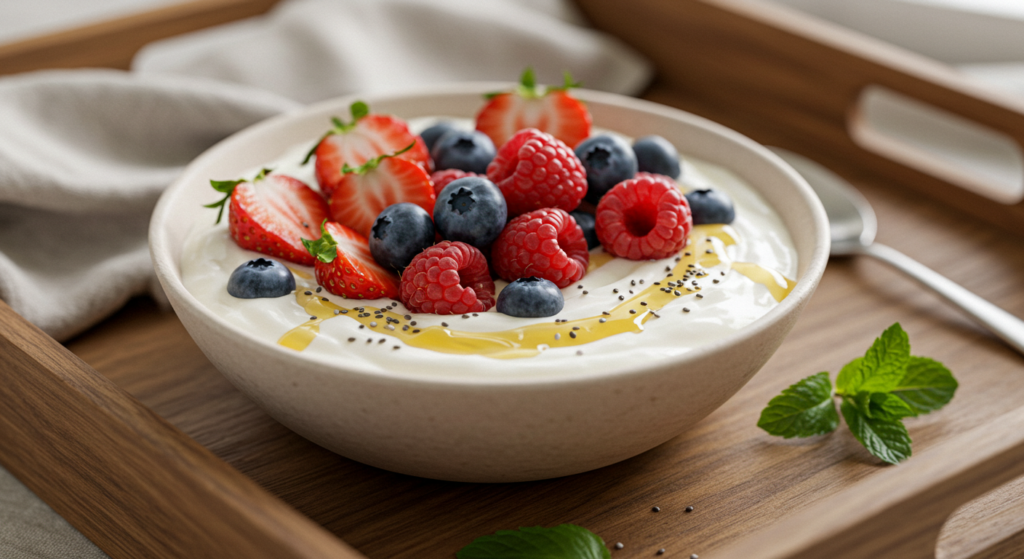
Keep plain yogurt, then finish each bowl right before you eat. Good add-ins:
- Frozen berries or sliced peaches that thaw in a few minutes
- A spoon of chia or flax, so it thickens slightly
- Lemon zest and chopped mint for a clean, fresh note
Whether you mix them in right before eating or prep small containers ahead of time, these combinations keep your routine from getting boring.
Step-by-Step Greek Yogurt Recipe

Heat and Cool the Milk
Temperature control matters more than anything here. It decides how creamy your yogurt feels, how tangy it tastes, and whether it sets right. After a couple of tries, it becomes second nature.
Heating Helps Eliminate Unwanted Bacteria
Before you introduce your yogurt starter, you need to warm the milk to about 180°F (82°C). This step kills off any potentially harmful bacteria and helps the milk proteins change in a way that supports thickening later on. Don’t rush this part—slow, even heating is key.
You can do this on the stovetop using a heavy-bottomed pot. Gently stir the milk now and then to prevent scorching, and use a kitchen thermometer for accuracy. As soon as the milk reaches the right temperature, take it off the heat right away — that’s how you keep it smooth and full of flavor.
Cooling Prepares It for the Starter
After heating, the milk must cool down to around 110°F (43°C) before you add your yogurt starter. If it’s too hot, it can destroy the live cultures. If it’s too cold, the fermentation process may not activate properly.
Let the milk cool down on its own, or set the pot in a bowl of ice water if you’re in a hurry. Give it a few stirs now and then so it cools evenly. Check the temperature before adding the starter — that’s what helps the yogurt culture properly. This simple step—heating and cooling the milk correctly—is the backbone of every reliable homemade Greek yogurt recipe. Once mastered, it becomes second nature and sets you up for delicious, consistent results every time.
Add Starter and Ferment
Once your milk has cooled to the right temperature, it’s time for the most critical part of the Greek yogurt recipe—adding the starter and beginning the fermentation process. This is where your milk transforms into rich, tangy, homemade yogurt.
Mix in the Yogurt Starter Gently
Your starter is what brings your yogurt to life—literally. It contains the live, active cultures that ferment the milk and create that creamy, probiotic-rich consistency we love. For each quart of milk, scoop in two or three tablespoons of plain yogurt that has live active cultures. It doesn’t take much — just enough to get the fermentation going.
Gently stir your starter into the cooled milk—no need to whip or beat it. A few slow turns with a spoon are enough to spread the cultures evenly without messing up the texture. If this is your first try, pick a plain yogurt from the store that says “live and active cultures.” After that, just save a few spoonfuls from your own batch to use next time.
Let the Fermentation Work Its Magic
Once your starter are mixed in, the rest is just patience. Pour the milk into a clean glass or ceramic bowl, cover it, and find a cozy, warm spot. You’re aiming to keep it gently warm—around 100 to 110°F—for several hours so the cultures can do their thing.
You can leave it in the oven with the light on, tuck it into an Instant Pot on the yogurt setting, or wrap it up in a towel inside a cooler. The longer you let it sit, the tangier it gets. Around six to eight hours gives you a mild taste; closer to twelve makes it bold and spicy.
Strain and Store
Thick, creamy Greek yogurt at home. What sets Greek-style yogurt apart from regular yogurt is this next part: straining. Not only does it improve the texture, but it also concentrates the flavor and boosts the protein content.
Strain for That Classic Greek Creaminess
Straining removes the liquid whey from the yogurt, giving it that signature rich, velvety consistency. To do this, place a cheesecloth or clean kitchen towel over a fine mesh strainer. Set the strainer over a bowl to catch the liquid, then pour in your homemade yogurt.
Let it strain in the fridge for 2 to 4 hours, depending on how thick you like it:
- 2 hours = lightly thick, similar to store-bought
- 4 hours = thick and spreadable, like cream cheese
For ultra-thick Greek yogurt, strain it overnight. Just be sure to cover it loosely to keep it fresh.
Store It Right to Keep It Fresh
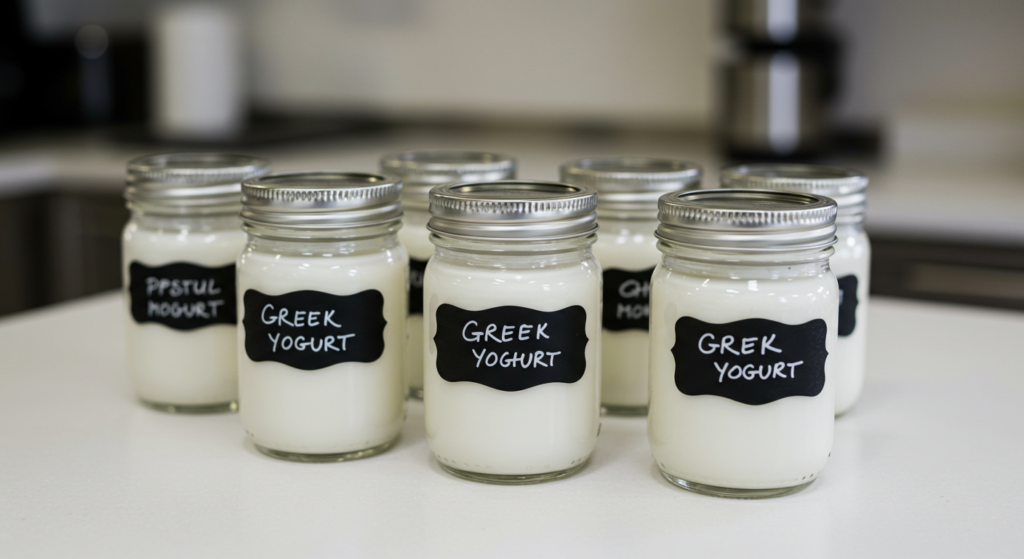
Once your yogurt thickens the way you like it, spoon it into clean jars or airtight containers. Please keep it in the fridge, and try to finish it within a week or so while it’s still fresh.
If you plan to make another batch soon, save a few tablespoons from this one — it’ll work perfectly as your next starter. That way, you’ll never have to go back to store-bought yogurt again.
To help it stay fresh longer:
- Use clean, sterilized jars.
- Seal them tightly
- Write the date on the lid so you know how long it’s been in the fridge.
Tips, Variations & Serving Ideas
Pro Tips for the Creamiest Texture
Achieving that rich, velvety smoothness in your Greek yogurt recipe is easier than you might think—it just takes a little attention to detail at each stage of the process. Whether this is your first batch or your weekly routine, a few minor tweaks can change the texture a lot.
Start with the Right Ingredients and Temperature
If you want thick, creamy yogurt, it starts way before straining. Whole milk is my go-to because it naturally makes the yogurt smooth and rich. Low-fat milk can work too, but expect a lighter result unless you give it more time to strain.
When heating, bring the milk up to roughly 180°F, then let it cool back to around 110°F. That quick warm-up and cool-down step makes a big difference—it helps the milk thicken properly later and gives the yogurt that smooth, balanced texture.
Timing, Straining, and Stirring Matter
How long you let it ferment and how you strain it will decide how thick and creamy your yogurt turns out. Letting the yogurt ferment for a full 8 to 12 hours will give it more time to set, thicken, and develop a balanced tang. The longer it sits (within reason), the denser and richer it becomes.
Once fermented, be gentle when you transfer the yogurt to a strainer. Use cheesecloth or a fine mesh strainer and let gravity do the work—no squeezing or pressing. Rushing this step can result in a gritty or broken texture instead of that signature creaminess.
And finally, when your yogurt is ready to eat, stir it gently. Mix gently. Stirring too much can loosen the texture and undo some of the thickness that formed while it was fermenting.
Flavor Variations to Try
One of the best things about following your Greek yogurt recipe is the freedom to make it taste exactly how you like. Whether you want your yogurt plain, fruity, or with a creative twist, there are tons of simple ways to make it taste amazing—no added sugar or fake flavoring needed.
Sweet and Fruity Favorites
I like my yogurt simple, but it should still feel special. A spoon of honey, a bit of vanilla, or a handful of fruit can change everything.
Try these:
- Honey and vanilla for mellow sweetness
- Berries and cinnamon for a hint of spice
- Mango, pineapple, and lime zest for a bright, sunny flavor
- These little add-ins make your yogurt richer and more fun to eat without drowning out its natural tang.
Savory and Unexpected Twists
Think beyond breakfast—Greek yogurt’s thickness makes it ideal for savory recipes too. You can turn it into a dip, dressing, or creamy side in minutes.
Experiment with:
Use these versions with chicken, roasted veggies, or as spreads for wraps and grain bowls.
Minced garlic + olive oil + lemon juice for a Mediterranean-style sauce
Cucumber + dill for a cool, herby mix
Paprika or red pepper flakes, if you like a little kick
conclusion
Making Greek yogurt at home really changes the way you think about something so simple. It’s fresh, clean, and made with just what you want—no fillers, no weird extras. Once you try it, you realize how easy it is to get that thick, creamy texture without anything fancy: just milk, a little yogurt to start it off, and time.
The best part is the control. You decide how thick it gets, how tangy it tastes, and what goes into it. It’s real food made in your own kitchen, and it tastes that way—rich, smooth, and full of life. It works for breakfast, snacks, even savory meals, and you can tweak every batch to fit your day.
If you’ve been buying yogurt for years, this is your sign to try making it yourself. You’ll save money, waste less packaging, and probably never want to go back to store-bought again.
Give it a try, see how it turns out, and let me know how you made yours. Did you go thick and tangy or mild and creamy? Drop a comment and share what worked for you—your version might inspire someone else to start their own yogurt routine too.
The Ultimate Greek Yogurt Recipe: Creamy, Healthy, and Homemade
Ingredients
- 4 cups milk (whole milk for creamy texture, 2% for lighter version, or lactose-free if needed)
- 3 tbsp plain yogurt with live and active cultures (as starter)
Optional Add-Ins (after fermentation)
- Honey or maple syrup – for natural sweetness
- Vanilla extract – for a smooth, cozy flavor
- Cinnamon or nutmeg – for extra warmth
- Fresh fruit such as berries, banana, or mango –for natural flavor and color
- Chia seeds or flaxseeds – for added texture and nutrition
- Lemon zest or mint – for a bright finish
Instructions
- Heat the Milk· Pour milk into a clean, heavy-bottomed pot.· Warm slowly over medium heat until it reaches 180°F(82°C).· Stir occasionally to prevent burning.· Once it reaches temperature, remove from heat immediately.· This step helps create a smooth, thick yogurt texture.
- Cool the Milk· Let the milk cool to about 110°F(43°C) before adding the yogurt starter.· You can cool it at room temperature or place thepot in a bowl of ice water to speed it up.· Stir now and then so it cools evenly.
- Add the Yogurt Starter· Once cooled, gently mix in 2–3 tablespoons of plain yogurt with live cultures.· Stir slowly—avoid whisking or overmixing to keep the proteins intact.· If this is your first batch, use a store-bought yogurt labeled “live and active cultures.” For future batches, save a few spoonfuls of your own homemade yogurt to use as your starter.
- Ferment the Yogurt· Pour the milk mixture into a clean glass orceramic bowl.· Cover and keep it in a warm place (around 100–110°F/ 38–43°C) for 6 to 12 hours.· Use an oven with the light on, a yogurt maker, or wrap it in a towel to keep it warm.· The longer it ferments, the tangier your yogurt will be.
- Strain for Greek-Style Thickness· Once set, line a fine mesh strainer with cheesecloth or a clean towel and place it over a bowl.· Pour the yogurt in and refrigerate for 2–4hours (for regular Greek yogurt) or overnight (for extra thick texture).· Let gravity do the work—no squeezing needed.
- Store and Enjoy· Transfer your finished yogurt to clean jars or airtight containers.· Refrigerate for up to 7–10days.· Save 2 tablespoons from this batch as your starter for the next one.
Notes
Fermentation Time: 6–12 hours
Straining Time: 2–4 hours
Total Time: About 8–14 hours (mostly hands-off)
Tips:
- Use whole milk for the creamiest results.
- For dairy-free versions, use coconut or almond milk with a plant-based starter.
- Don’t skip the heating and cooling steps—they ensure the right texture and flavor.
- The longer you strain, the thicker your yogurt will be.
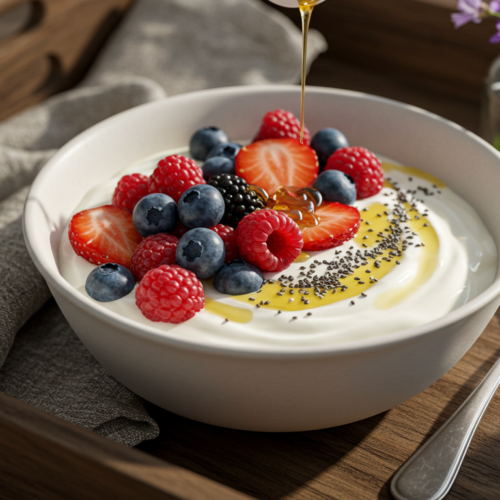
Serving Suggestions:
- Enjoy plain, or top with honey, vanilla, and fruit for sweetness.
- Use as a base for dips or dressings with olive oil, garlic, or herbs.
- Mix into smoothies or overnight oats for a protein-packed breakfast.