


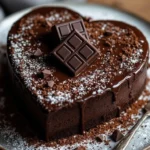
Want to make the perfect chocolate heart cake—one that bakes evenly, stays moist, and comes out with a clean heart shape (not cracked edges or a dry center)? You’re not alone. Heart-shaped cakes can be tricky because shaped pans heat differently, and even a great chocolate batter can turn dense or crumbly if the timing is off.
That’s why this recipe walks you through an easy, dependable method from start to finish. You’ll get pan options (heart pan or a simple DIY heart shape), clear mixing and baking steps, and the best cues for knowing when it’s done—so you don’t overbake it. I’ll also share a smooth, beginner-friendly frosting and decorating approach (including a quick crumb-coat trick) to help your cake look bakery-pretty without complicated tools.
This chocolate heart cake is perfect for Valentine’s Day, anniversaries, birthdays, or anytime you want a sweet, special dessert that actually works. Jump to Recipe if you’re ready to bake!
Why This Chocolate Heart Cake Works
Moist, rich chocolate flavor (not dry)
Chocolate cakes dry out when the batter is slightly off, the mixing goes too far, or the cake stays in the oven a few minutes too long. This recipe is built to keep the crumb soft and rich by balancing fat and liquid and using cocoa in a way that gives deep flavor without turning the cake dusty.
A big key is mixing. Once you add the dry ingredients to the wet, you only mix until the last streaks of flour disappear. Overmixing develops gluten and tightens the cake, which makes it feel dense instead of tender. The other key is bake time. You’re not waiting for a toothpick to come out bone-dry. You want a few moist crumbs and a cake that springs back gently when you tap the center. Pulling it at the right moment helps it finish setting as it cools, which keeps it moist instead of overbaked
Heart-shape success (clean edges, even bake)
The heart shape is the whole point, but it’s also what causes most of the problems. Curves and corners can bake at different speeds, and cakes love to stick where the pan narrows.
You have two solid options:
- Heart-shaped pan: Cleanest and simplest if you own one.
- DIY heart method: Use a round pan + a square pan to make a heart shape without buying a specialty pan.
Lining the bottom of the pans with parchment paper and greasing the sides makes releasing the cake much easier. Cooling matters too; if you try to remove a warm heart cake too soon, it can crack at the “point” or break at the curves. first Let the cake rest in the pan for a few minutes to help the cake firm up, then you flip it out safely.
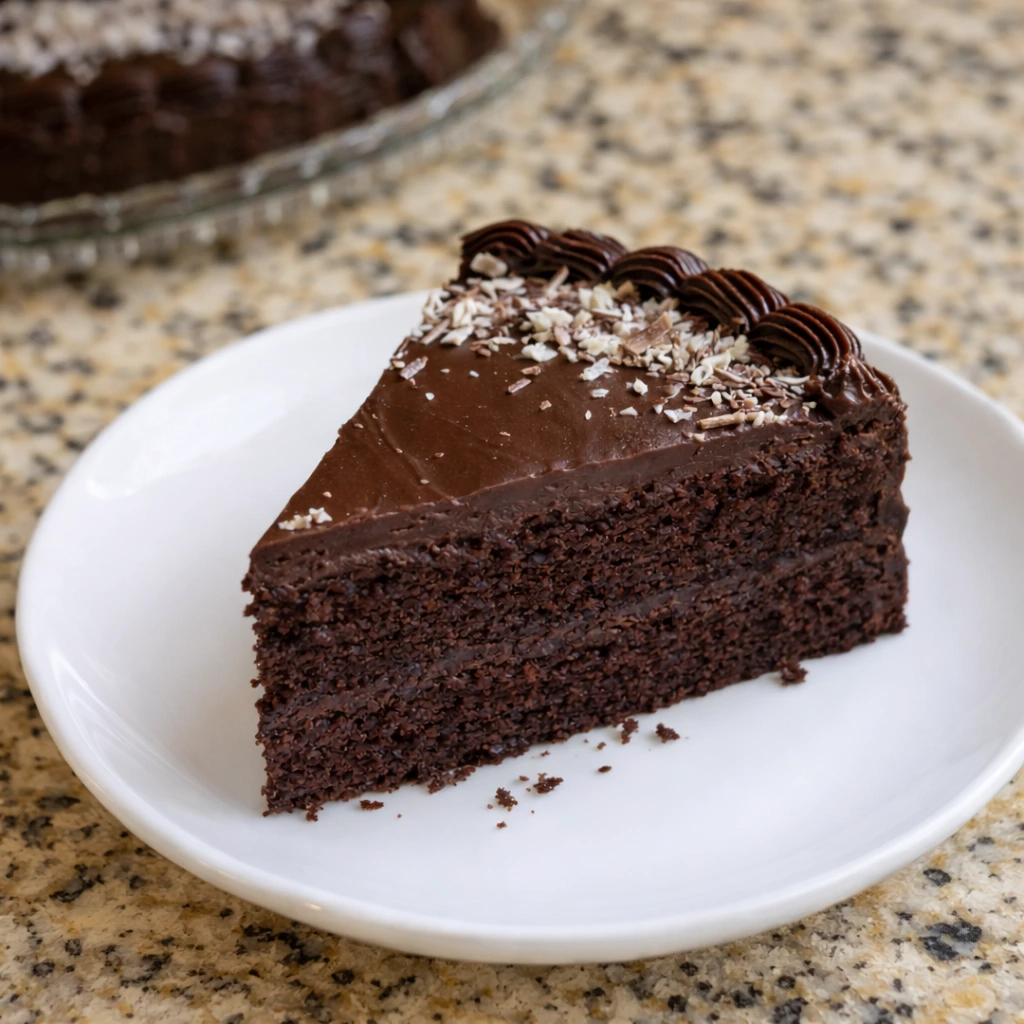
Smooth frosting finish (no crumbs, no mess)
Chocolate cake crumbs are real. If you frost right away with a thick final layer, crumbs can drag through the frosting and ruin the smooth look.
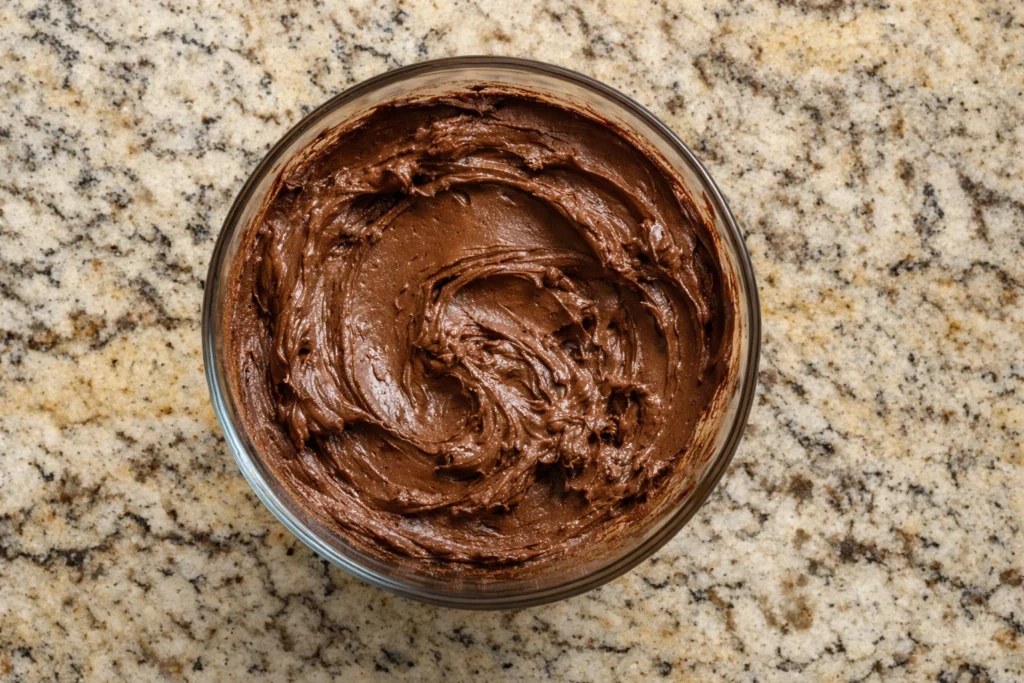
The fix is simple: crumb coat + chill.
A crumb coat is a thin layer of frosting that traps crumbs. After a short chill, the frosting firms up and your final coat glides on clean. You don’t need fancy equipment either. An offset spatula is nice, but a butter knife and a smooth motion will still get you a pretty finish.
Ingredients You’ll Need
Cake ingredients
Here’s what you’ll use for the cake (exact amounts are in the Recipe Card):
- All-purpose flour
- Unsweetened cocoa powder (natural or Dutch-process)
- Baking powder + baking soda
- Salt
- Granulated sugar
- Eggs
- Neutral oil (or melted butter)
- Milk or buttermilk
- Vanilla extract
- Hot coffee or hot water (optional but very helpful for a deeper chocolate flavor)
Optional boosters (for extra moisture and flavor):
- Sour cream or plain yogurt
- Mini chocolate chips (lightly folded in)
Frosting options
Choose your frosting based on how you plan to decorate:
- Chocolate buttercream: Best if you want something sturdy for piping borders and writing.
- Ganache: Great when you want a smooth chocolate look or an easy drip around the edges.
- Cream cheese frosting (optional): A little tangy and less sweet—nice if you don’t want a super-rich finish.
How to Make Chocolate Heart Cake
Prep your pans (heart pan or DIY method)
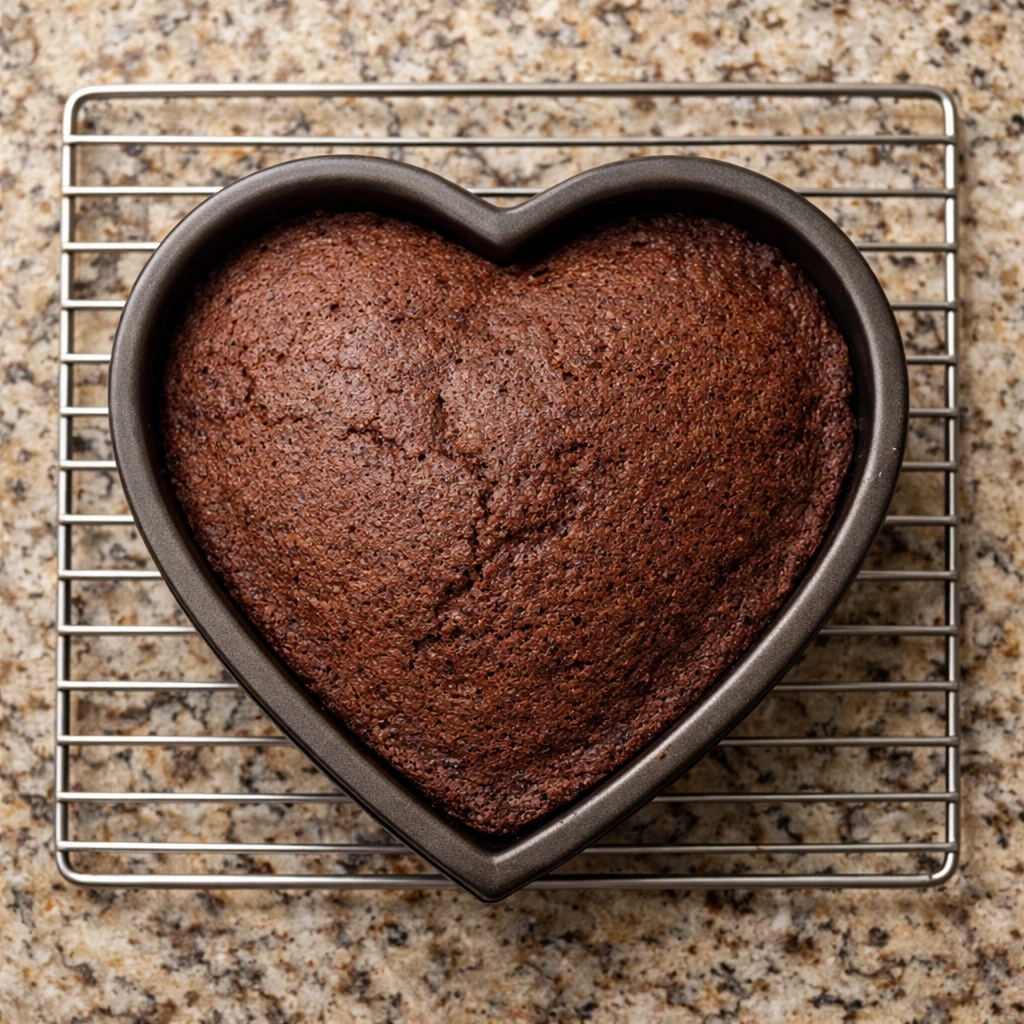
Option A: Heart-shaped pan
Heart pan option:
If you have a heart-shaped pan, use a 9-inch one (anything close is fine). Cut a piece of parchment for the bottom so the cake releases cleanly. Then, grease the sides really well and dust with a light coat of cocoa powder—this helps prevent sticking without leaving white marks.
DIY heart option (round + square):
This makes a heart cake using common pans.
If you don’t have a heart pan, you can still make the shape with pans you probably already own. Bake the batter in one 8-inch square pan and one 8-inch round pan, then let both cakes cool completely. Cut the round cake in half, set the square cake on a board like a diamond (with one point facing down), and snug the two half-round pieces against the top sides to create a heart.
Pan prep for both options:
- Grease the pan(s).
- Line the bottom(s) with parchment.
- Grease again lightly on top of the parchment.
- Preheat oven to 350°F (177°C).
Pan Size + Batter Amount (So It Bakes Evenly)
This Chocolate Heart Cake works great in both 8-inch and 9-inch heart pans. Here’s what changes:
- If you use an 8-inch heart pan, the batter will sit a little deeper, so the cake may need a few extra minutes in the oven.
- If you use a 9-inch heart pan, the batter spreads out more, so it usually bakes a bit faster—start checking early, because the edges can dry out quickly in a wider pan.
For the DIY heart method (round + square pans), you’ll get the cleanest shape when the pans are the same size, most often an 8-inch round and an 8-inch square.
- To make a single-layer heart, divide the batter evenly between the two pans and bake.
- To make a two-layer (taller) heart cake, use two 8-inch rounds and two 8-inch squares (or bake in batches), split the batter evenly so each layer bakes at the same rate.
Quick tip: If you’re unsure, pour batter into one pan first, then match the batter height in the second pan. Even batter depth helps both cakes finish together.
Make the batter
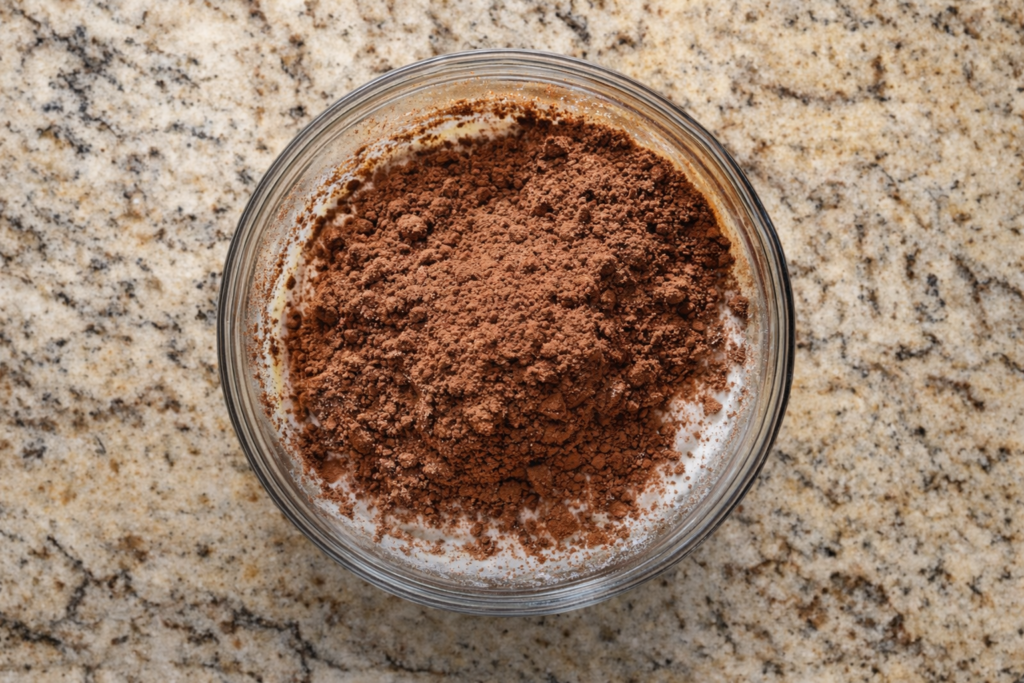
- Mix dry ingredients: blend flour, cocoa, baking powder, baking soda, and salt until the cocoa is evenly combined.

- Mix wet ingredients: In another bowl, blend sugar, eggs, oil, milk (or buttermilk), and vanilla until smooth.
- Combine carefully: Add dry to wet and mix gently just until combined. Stop when you don’t see dry flour.
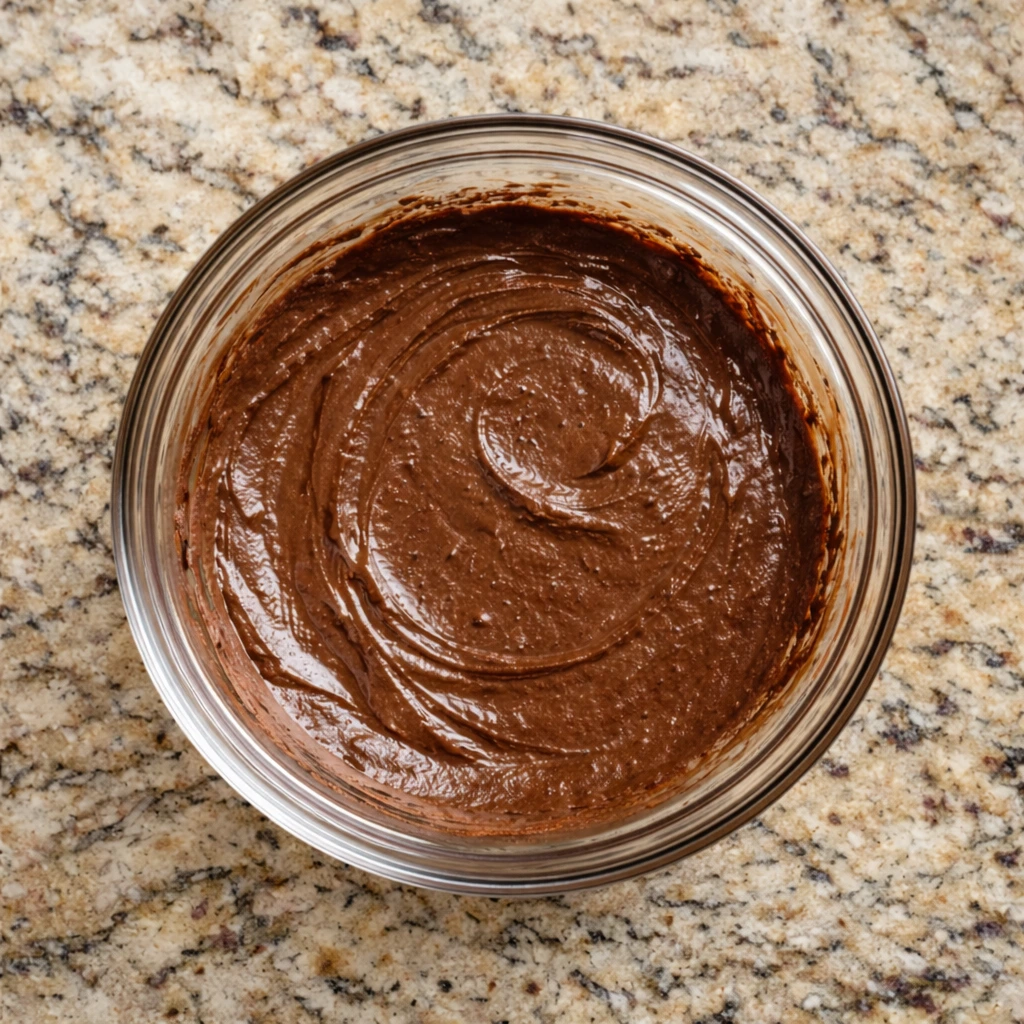
- Add hot coffee or water (optional): Pour in slowly while whisking. This helps the cocoa bloom and deepens the flavor.
- Optional add-ins: Fold in sour cream/yogurt or chocolate chips gently.
Bake + cool (the non-negotiables)
- Pour batter into the prepared pan(s).
- Bake until the centre springs back lightly, and a toothpick that isn’t wet just lightly crumbed
- Heart pan times vary. Start checking around the 25–30 minute mark.
- For the 8-inch round and square pans, start checking around 22–28 minutes.
- Cool in the pan for 10–15 minutes.
- Run a thin knife around the edges.
- Unmold onto a rack and wait until it’s completely cool before frosting.
Safe unmolding tip: If the cake feels fragile, chill it for 20–30 minutes after it reaches room temp. A slightly chilled cake is sturdier and easier to frost.
Frosting + Decorating
Crumb coat for a smooth finish
- Level the cake if needed (a small dome is normal).
- Spread a light coat of frosting over the entire cake. Do not aim for perfection.
- Chill the cake for 20–30 minutes until the frosting feels firm.
- Apply the final coat of frosting. This layer should go on smoothly with far fewer crumbs.
Easy decorations anyone can do
You don’t need fancy decorating skills to make this cake look like a showstopper. Pick one idea, then add one “finishing touch.”
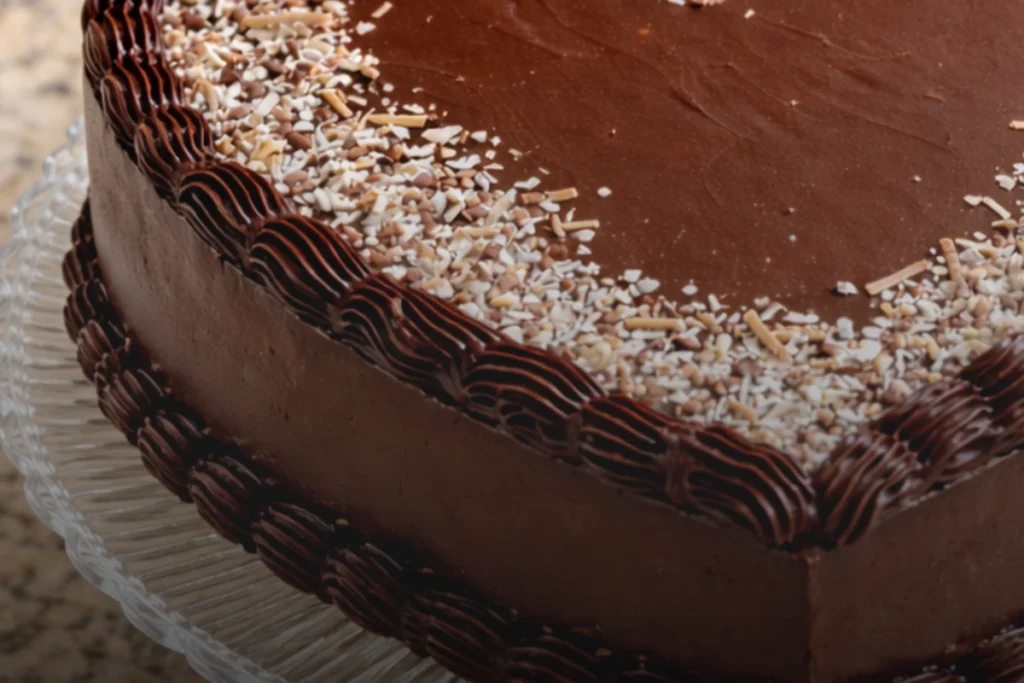
Try a piped border if you want a clean edge fast. A simple shell or star border also covers any frosting bumps.
For a fresh look, add strawberries—ring them around the top or pile them in the center.
If you’re using sprinkles, add them right after frosting so they actually stick (once the frosting sets, they bounce off).
Want instant texture? Make chocolate shavings with a veggie peeler and scatter them on top.
Or keep it effortless with a ganache drizzle. Spoon it over the top and let it drip where it wants.
Sharp edges + clean heart shape tips
After your crumb coat, pop the cake in the fridge so the frosting firms up. When you’re ready for the final coat, smooth the sides with a bench scraper or even the flat side of a knife. Take your time around the heart point—it’s the most fragile spot, and rushing can tear the cake or pull crumbs into the frosting. If the frosting starts tugging instead of gliding, stop and chill the cake for about 10 minutes, then try again.
Tips for Best Results
- Measure flour carefully: Spoon it into the cup, then level it. Dipping the cup straight into the bag compresses the flour, and that can dry out your cake.
- Bloom the cocoa: Stir hot coffee or hot water into the cocoa portion of the batter (or add it as directed). It deepens the chocolate flavor without adding extra ingredients.
- Use ingredients that aren’t ice-cold: Eggs and dairy mix more smoothly when they’re closer to room temperature. That helps the batter bake up more evenly.
- Mix gently once the flour goes in: Stop as soon as the batter looks uniform. Overmixing can tighten the crumb and make the cake feel heavy.
- Watch the bake, not the clock: The center should spring back lightly, and your tester should come out with a few soft crumbs—no wet batter.
- Line the pan: Parchment on the bottom plus grease on the sides saves you from stuck corners and broken edges.
- Cool fully before frosting: Warm cake melts frosting and creates sliding layers. If you’re in a hurry, chill the cake briefly.
- Crumb coat every time: Even if you do not care about perfection, crumb coating makesfrosting calmer and cleaner.
Variations
Strawberry-filled chocolate heart cake
Slice the cake into two layers and add a thin layer of strawberry jam plus a layer of buttercream. It tastes like chocolate-covered strawberries and looks great with fresh berries on top.
Raspberry ganache filling
Add a small, light layer of raspberry preserves on the top of the cake, then spoon slightly thick ganache over it. Chill before stacking so it stays neat when you slice.
Mini heart cakes or cupcakes
Use a cupcake pan for an easy version. If you want mini hearts, bake a sheet cake and cut heart shapes with a cookie cutter. Frost and decorate each mini heart.
Extra-fudgy version
Fold in mini chocolate chips and add a spoonful of sour cream or yogurt. The crumb turns richer and slightly denser in a good way.
Ganache drip finish
Frost the cake with buttercream, chill it, then drizzle warm (not hot) ganache around the edge. It gives a bakery look with very little effort.
Storage + Make-Ahead
This cake tastes best within the first two days, when the crumb is still soft, and the chocolate flavor feels fresh.
If you’re keeping it on the counter, cover it well and leave it at room temperature for about one day (buttercream holds up best for this). For longer storage, move it to the fridge in a covered container and keep it there for up to four days. Before serving, let slices sit out for 20–30 minutes so the cake isn’t cold and firm. For freezing, you can wrap unfrosted layers or individual frosted slices. Wrap each piece tightly in plastic wrap, add a layer of foil, and freeze for up to two months for the best flavor. Leave it overnight in the refrigerator, and let it sit at room temperature before eating.
Troubleshooting
Why did my cake sink in the middle?
A sunken center usually comes from pulling the cake a little too soon, mixing the batter too long, or baking in an oven that runs cooler than it says. Next time, test the center with a light press (it should spring back), and consider using an oven thermometer so you know your temperature is accurate.
Why is my cake dry?
Most dry cakes are simply baked too long, or they end up with extra flour from measuring. Start checking a few minutes earlier, take it out when the tester shows soft crumbs (not wet batter), and fill your measuring cup by spooning flour in rather than scooping.
Why is my cake dense instead of fluffy?
A heavy texture usually means the batter was mixed too much once the flour went in, which tightens the crumb. It can also happen if your baking powder or baking soda is past its prime, so fresh leaveners make a big difference.
Overmixing after adding flour can do this. Moreover, check your baking powder and baking soda freshness.
Why did my cake crack?
Cracks often come from an oven that’s too hot or a cake that baked too long. It can also happen if you try to flip the cake out too soon.
Why did my cake stick to the pan?
Skip the “just grease” approach. Use parchment on the bottom, grease the sides well, and cool for 10–15 minutes before flipping.
Why did my heart cake break at that point?
That area is thin and fragile. Let it cool longer, then chill the cake before frosting. Handle it with two hands or slide it on a board.
My ganache is too thin. How do I fix it?
Let it cool longer at room temp, stirring every few minutes. If it’s still too thin, add a little more melted chocolate.
My ganache is too thick. How do I fix it?
Warm it gently in short bursts and stir well. A small splash of warm cream can loosen it.
My buttercream looks grainy.
This usually means the butter was too cold or the sugar did not mix fully. Keep mixing longer. If needed, warm the bowl slightly by holding it over warm water for a few seconds, then mix again.
My frosting is sliding off the cake.
The cake is still warm, or the frosting is too soft. Chill the cake, then chill the frosting for 10 minutes and try again.
FAQ
Can I make a heart cake without a heart-shaped pan?
Yes. Use one 8-inch square pan and one 8-inch round pan. Cut the round cake in half and place the halves on two sides of the square to form a heart.
What pan size works best?
A 9-inch heart pan works well. For the DIY method, matching 8-inch pans (one square, one round) makes a clean heart.
Can I make this cake a day ahead?
Yes. Bake the layers a day ahead, wrap well, and store at room temp or in the fridge. Frost the next day for the cleanest finish.
How do I keep chocolate cake moist?
Do not overbake, measure flour correctly, and consider adding sour cream or yogurt. Also keep the cake covered once cooled.
What frosting is best for decorating?
Chocolate buttercream is the easiest for smooth frosting and piping. Ganache is great for a glossy finish and drips.
Can I use Dutch-process cocoa?
Yes. Dutch-process gives a deeper color and smoother chocolate flavor. Natural cocoa works too.
How do I get clean slices?
Chill the cake for 20 minutes, then cut with a warm knife. Wipe the knife between slices.
Can I use a 9-inch round + 9-inch square for the DIY heart?
Yes—as long as both pans are the same size, the DIY heart method still works. A 9-inch version will make a larger heart, and the cake layers may bake slightly faster because the batter spreads out more. Start checking a few minutes earlier than the 8-inch timing, and focus on doneness cues (springy center + moist crumbs).
How do I scale this to a 6-inch heart cake?
For a 6-inch heart cake, scale the batter down so the pan isn’t overfilled—too much batter makes the cake bake up tall, and the edges can dry out. Making about half the recipe usually works well in a 6-inch heart pan, and you’ll want to start checking for doneness earlier than a larger cake. If you’re doing the DIY method, use a 6-inch round and a 6-inch square, and watch the oven closely since smaller layers bake faster.
Can I bake this as two layers for a taller heart cake?
Yes! For a taller cake, bake two heart layers (or two sets for the DIY method). The easiest way is to use two heart pans (or bake in batches). Let layers cool completely, then level if needed, add filling or frosting between layers, crumb coat, chill, and finish frosting. Taller cakes look best when they’re slightly chilled before final smoothing.
Recipe Card: Chocolate Heart Cake

Want to Make the Perfect Chocolate Heart Cake? Try This Recipe!
Ingredients
Cake Batter
- 1 ½ cups all-purpose flour (or cake flour for a softer texture)
- ½ cup unsweetened cocoa powder (Dutch-process preferred)
- 1 tsp baking powder
- 1 tsp baking soda
- 1 tsp salt
- ¾ cup sugar
- ½ cup brown sugar
- ½ cup unsalted butter (softened)
- ⅓ cup vegetable oil
- 2 large eggs (room temperature)
- 1 tsp vanilla extract
- ¾ cup buttermilk
- ½ cup hot brewed coffee (enhances chocolate flavor)
Chocolate Buttercream Frosting:
- 1 cup unsalted butter (softened)
- 3 cups confectioners' sugar (powdered sugar)
- ½ cup unsweetened cocoa powder
- ¼ cup heavy cream or milk
- 1 tsp vanilla extract
- 1 pinch of salt
Chocolate Ganache (Optional)
- 1 cup dark chocolate (chopped)
- ½ cup heavy cream
Instructions
- Step 1: Prepare the Heart-Shaped Cake PanPreheat oven to 325°F (163°C).Grease and line a heart-shaped cake pan with parchment paper.
- Step 2: Mix the Dry Ingredients3️ In a bowl, whisk flour, cocoa powder, baking powder, baking soda, and salt.
- Step 3: Make the Batter In another bowl, cream butter, granulated sugar, and brown sugar until light and fluffy. Beat in eggs one at a time, then add vanilla extract. Mix in oil and buttermilk until combined. Gradually add dry ingredients while mixing on low speed. Stir in hot brewed coffee until the batter is smooth.
- Step 4: Bake the CakePour the batter into the heart-shaped pan and smooth the top. Bake for 30-35 minutes, or until a toothpick inserted in the center comes out with a few moist crumbs. Let the cake cool in the pan for 10 minutes, then transfer to a wire rack to cool completely
- Step 5: Make the FrostingBeat butter, powdered sugar, cocoa powder, and salt until fluffy. Add vanilla extract and heavy cream (one tablespoon at a time) until smooth.
- Step 6: Frost & Decorate the CakeOnce the cake is cool, spread a thin crumb coat of frosting and chill for 15 minutes. Frost the cake evenly with buttercream, using an offset spatula. If using ganache, melt chocolate and heavy cream together, let it cool slightly, then drizzle over the cake. Decorate with chocolate shavings, fresh berries, or edible flowers.
- Notes & Variations: Substitutions: Swap buttermilk for plain . Egg-Free Version: Use ½ cup unsweetened applesauce instead of eggs. Low-Sugar Option: Replace sugar with coconut sugar or a sugar substitute. Make It Ahead: Bake the cake a day before and store in an airtight container.
Notes
Notes & Variations:
Substitutions: Swap buttermilk for plain . Egg-Free Version: Use ½ cup unsweetened applesauce instead of eggs. Low-Sugar Option: Replace sugar with coconut sugar or a sugar substitute. Make It Ahead: Bake the cake a day before and store in an airtight container. Troubleshooting:- Dry cake: likely overbaked—start checking at 30 min; remove when a toothpick has a few moist crumbs.
- Cake sank: avoid overmixing; don’t open oven early.
- Domed top: oven may run hot—use cake strips or lower temp slightly.
- Ganache too thin: cool longer or add more chocolate.
- Ganache split: too hot—cool slightly and whisk gently; add warm cream gradually.