


You’re here for a Butterfinger cake recipe that’s simple and doesn’t turn out dry. This one is a chocolate poke cake, made in a 9×13 pan, and it’s hard to mess up. You bake the cake, then poke holes while it’s still warm.
Next, you pour on sweetened condensed milk and caramel so it sinks into the cake. That soak is what makes the inside taste rich instead of plain chocolate. I’ll walk you through how to make Butterfinger cake in a way that feels obvious. You’ll know what “warm” means, how many holes to poke, and when to stop pouring. Then you chill it so the topping stays neat when you spread it. Whipped topping goes on next, and it’s quick. After that, you crush Butterfinger bars and scatter them over the top.
I’ll also share a few minor fixes for crunch, slicing, and make-ahead timing.
What Makes This Poke Cake So Popular
Butterfinger Cake Recipe Origins and Why it is Loved(Poke Cake Roots)
The Butterfinger cake recipe follows an old-school trick called a poke cake. You bake a chocolate sheet cake in one pan. Then you make small holes while the cake is warm. After that, you pour a sweet mixture on top. It sinks down and turns the cake soft inside. This is how you get that gooey bite without complicated baking.
Why poke cakes became so popular in every home for potlucks
Poke cakes are popular because they are cheap and reliable. One pan was enough. A boxed cake mix worked fine, so you saved time. It also fed a crowd with no extra planning. When you need dessert for a group, that matters. You can chill it and serve it later.
Why candy-bar cakes fit potlucks and parties today
Candy-bar cakes became number one choice for dessert option. You can bake, chill, and carry the same pan. The topping goes on fast, so it still looks fresh. Butterfinger fits this style because it adds crunch on top. It also gives a clear flavor cue in one look. That’s why it shows up at parties so often.
The Roots of Butterfinger Poke Cake
A Butterfinger poke cake starts with a simple sheet cake. Once it bakes, you poke holes across the top. Then you pour a sweet soak over it, so it can seep down into the cake. The whole idea is to get more flavor and have a cake that stays soft instead of drying out.
What makes a poke cake a poke cake
Bake a sheet cake in a 9×13 pan. Once it is baked, pour on something sweet, such as caramel and condensed milk, into the poked holes with a spoon or a fork handle while the cake is still warm. The holes help it spread out. So each slice tastes soaked, not just topped.
Why home bakers made this style popular
People love making Butterfinger Poke Cake because it’s reliable. You use simple ingredients that are primarily available in every home kitchen. You also do everything in one pan. That makes cleanup easier. And the 9×13 format just works. It travels well, feeds a group, and slices fast for parties.
Ingredients You’ll Need
Core Ingredients for the Classic Butterfinger Cake Recipe
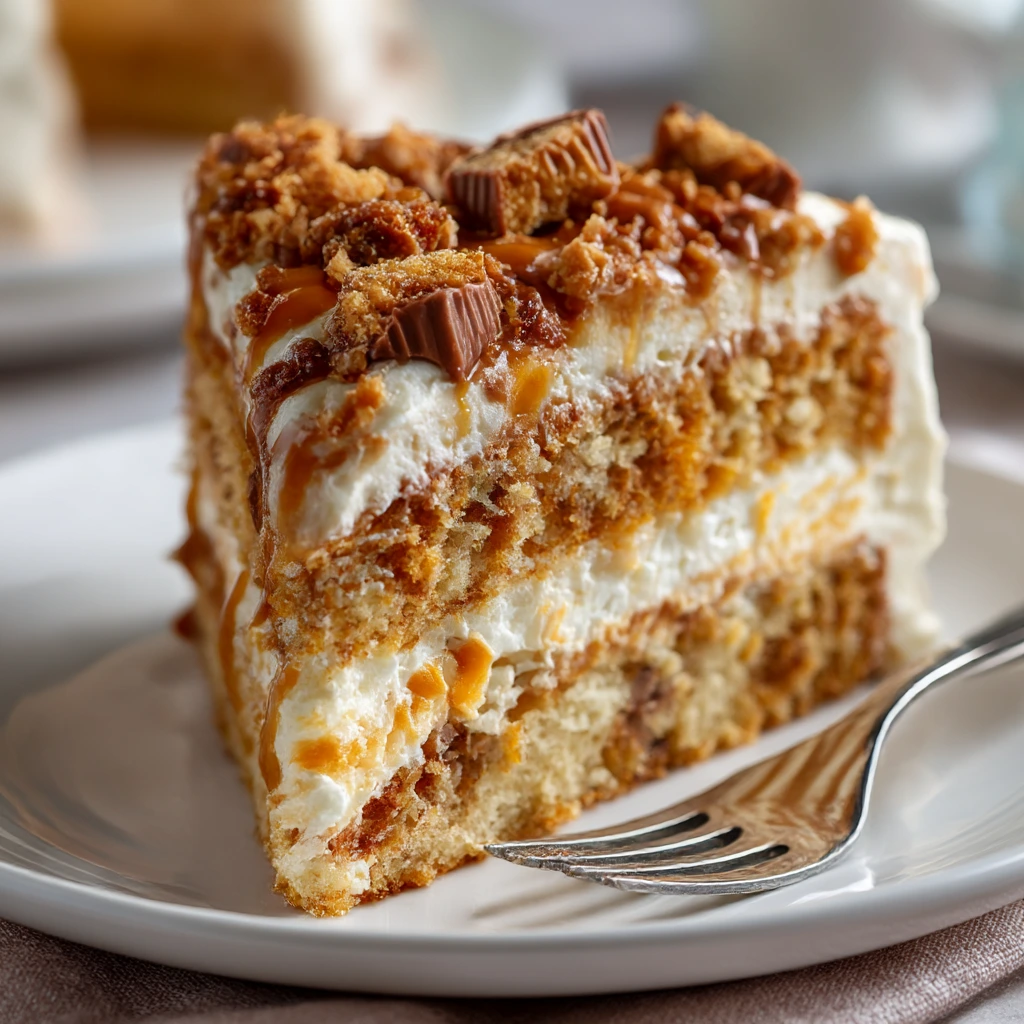
This Butterfinger cake recipe comes down to four parts. You start with a chocolate cake base. Then you add a sweet soak while the cake is warm. After that, you spread a fluffy topping. Last, you finish with chopped Butterfinger candy bars. Each layer adds something different.
Chocolate cake base for Butterfinger cake recipe
Use a chocolate cake baked in a 9×13 pan. A box mix works, or you can bake from scratch. Either way, follow the eggs, oil, and water amounts you need. Mix just until the batter comes together. Then bake and leave the cake in the pan.
Sweet soak, topping, and chopped Butterfinger
For the soak, use sweetened condensed milk and caramel sauce. Caramel topping works too. Pour it over the warm cake so it sinks into the holes. Next, add whipped topping or stabilized whipped cream. Then sprinkle chopped Butterfinger on top and save a little for garnish.
Smart Substitutions and Ingredient Notes for Butterfinger Cake Recipe
You can tweak the Butterfinger cake recipe without messing it up. The goal is to have the exact cake with a few changes. You want a chocolate base, a sweet soak, a creamy top, and a candy crunch. So if you’re missing something or you want a different vibe, these swaps still give you that soft, gooey, crunchy finish.
Butterfinger cake recipe swaps for cake and soak
For the cake, devil’s food tastes deeper and less sweet. It is rich in Chocolate fudge taste and also softer. If you decide to bake from scratch, keep it simple and not too airy. For the soak, you can add extra caramel for more gooey spots. A light chocolate drizzle works too. You can also do a pudding-style soak for a thicker bite.
Topping and Candy Choices for Butterfinger Cake
You can use homemade whipped cream topping. It tastes cleaner and less sweet. Stabilized whipped cream holds up longer in the fridge. If you want a thicker layer, add a cream cheese topping. Cool Whip works when you want the easiest option. For the candy, use Butterfinger bites or mini bars. You can also mix in other crunchy candy, but keep it chopped small.
How to Make Butterfinger Cake (Step-by-Step)
Bake and Poke the Butterfinger Cake Recipe
When you bake the chocolate cake in a 9×13 pan and keep it right there, you want the cake set, not jiggly in the middle. Once it comes out, don’t wait too long. Poking while it’s warm helps the soak sink in. That’s what makes the cake moist instead of dry. a trusted from-scratch chocolate cake base that fits your pan.
When to poke the Butterfinger cake while it’s warm
After baking the cake, you should let it cool down for about 10 minutes. But you want it to be warm, not too hot. This is to avoid tearing the cake when poked. Also, waiting too long can prevent it from soaking. Remember, warm cake pulls in Caramel and condensed milk more easily.
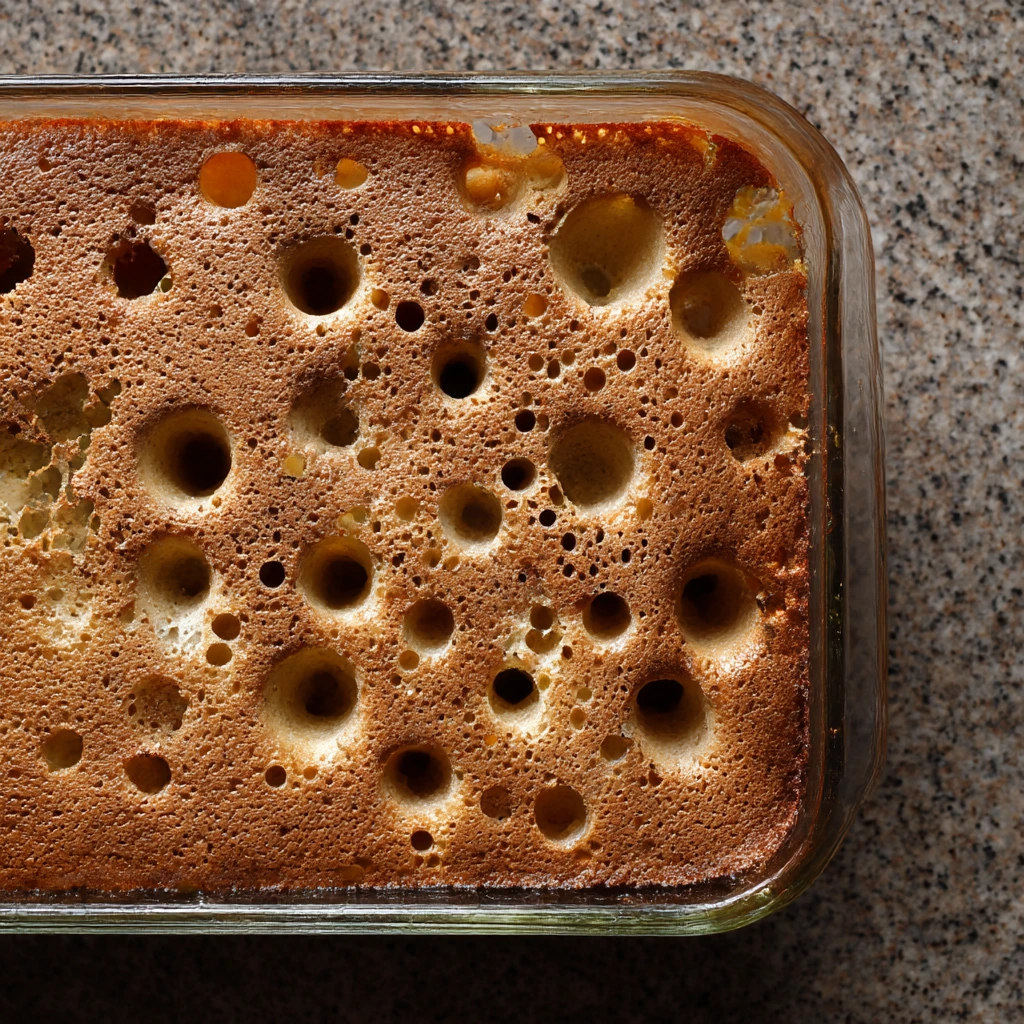
How to poke holes for even soaking
Use the handle of a wooden spoon, a thick straw, or a small dowel. Poke straight down, almost to the bottom. Space the holes about 1 inch apart. Don’t crowd them. You want the soak spread out, not pooled in one spot. Wipe the tool if cake sticks to it.
Soak, Top, and Chill the Butterfinger Cake Recipe for Best Texture
As the cake is still warm after baking and also poked, add the soak so it can sink in better. Spread the soak to the edges, not only the center. Let the cake cool before adding the topping. Finish with Butterfingers, then let it set and slice clean.
Pour the caramel soak into every hole.
Mix the sweetened condensed milk with caramel sauce, or pour them one after the other. Go slow. You want the liquid to fall into the holes, not run off the top. Use a spoon or spatula to push the soak toward the corners. If you see puddles, give it a minute. It will soak in.
Add topping, then chill before you slice.
Wait until the cake is cool before you spread whipped topping. If the cake is warm, the topping can melt. Spread it in an even layer from edge to edge. Sprinkle chopped Butterfingers right before chilling, so they stay crunchy. Chill at least 2 hours. Overnight is even better for clean slices.
Tips, Variations, and Serving Ideas
Pro Tips for Easy and Irresistible Butterfinger Cake Recipe Results
These tips fix the two things that usually go wrong. The cake can turn soggy, or the candy can go soft. A few small choices help a lot. Spread the soak the right way. Add the crunch at the right time. Then chill it long enough to slice clean.
Keep the Butterfinger cake from getting soggy.
Do not over-soak the cake. Try to slowly aim for the holes first. Note that you should have enough holes, as few holes make uneven spots. After that, spread the soak toward the edges. In case there are small pools, you can let them sink in. Please keep the cake moist, not wet.
Keep the Butterfinger crunch, then store it properly.
If you want the candy crisp, sprinkle it closer to serving time. Make sure not to add the crisp so early, as it can make the edges soft. Please let the cake sit for at least 2 hours. Overnight tastes even better and slices cleaner. Cover it tight in the fridge. Eat within 3 to 4 days for the best texture.
If you want a dessert that people actually finish, this Butterfinger cake recipe is a solid choice. You bake one chocolate cake. You poke it and pour on the caramel soak. Then you add the topping and the candy. The fridge does the rest. After a good chill, the slices come out clean, and the texture stays soft with that crunch on top.
Try Butterfinger poke cake, tell me how it went. Did you add extra caramel, or keep it simple? Did the candy stay crunchy for you?
Leave a comment with what you changed and how you served it. Your notes help the next person make it better.


How to Make Butterfinger Cake Recipe Easy and Irresistible
Ingredients
For the scratch chocolate cake (9×13)
- 2 cup all-purpose flour
- 3/4 cup unsweetened cocoa powder
- 2 cup granulated sugar
- 2 tsp baking powder
- 1 1/2 tsp baking soda
- 1 tsp salt
- 2 large eggs
- 1/2 cup neutral oil (vegetable or canola)
- 2 cups milk (or buttermilk)
- 2 tsp vanilla extract
- 1 cup hot coffee or hot water
For the sweet soak
- 1 can (14 oz) sweetened condensed milk
- 1 cup caramel sauce (or caramel topping)
For the topping (stabilized whipped cream)
- 2 cup heavy whipping cream, cold
- 1/3 cup powdered sugar
- 1 tsp vanilla extract
- 1 tsp instant vanilla pudding mix (stabilizer option)
For the finish
- 4 to 6 bars Butterfinger bars, chopped or crushed (about 1 1/2 to 2 cups)
Instructions
- Prep the pan and ovenPreheat oven to 350°F. Grease a 9×13 pan, then lightly dust with cocoa powder or line with parchment if you prefer easier lifting.
- Make the cake batterIn a large bowl, whisk flour, cocoa powder, sugar, baking powder, baking soda, and salt. Add eggs, oil, milk, and vanilla. Whisk until the batter looks smooth and no dry pockets remain. Pour in the hot coffee (or hot water) and whisk again. The batter will look thin. That’s normal.
- Bake the cakePour batter into the pan. Bake 26–32 minutes, or until a toothpick comes out with a few moist crumbs. Don’t overbake.
- Poke holesCool the cake for 10 minutes. Use the handle of a wooden spoon to poke holes all over the cake, spacing them about 1 inch apart.
- Add the sweet soakIn a bowl, stir sweetened condensed milk and caramel sauce until combined. Pour the mixture slowly over the cake, moving across the pan so it soaks evenly. Let it sit 10 minutes, then cover and refrigerate at least 3 hours (overnight is great).
- Make the stabilized whipped creamIn a cold bowl, whip heavy cream until it starts to thicken. Add powdered sugar, vanilla, and instant pudding mix. Continue whipping until you get stiff peaks.
- Top the cakeSpread the stabilized whipped cream over the chilled cake in an even layer.
- Add ButterfingerSprinkle chopped or crushed Butterfinger bars over the top. For best crunch, save a small handful and add it right before serving.
Notes
Crunch tip: Add some Butterfinger right before serving so it stays crisp.
Caramel option: Caramel sauce is thicker; caramel topping pours faster. Either works.
Storage: Cover and refrigerate up to 4 days. The topping stays best when kept cold.